

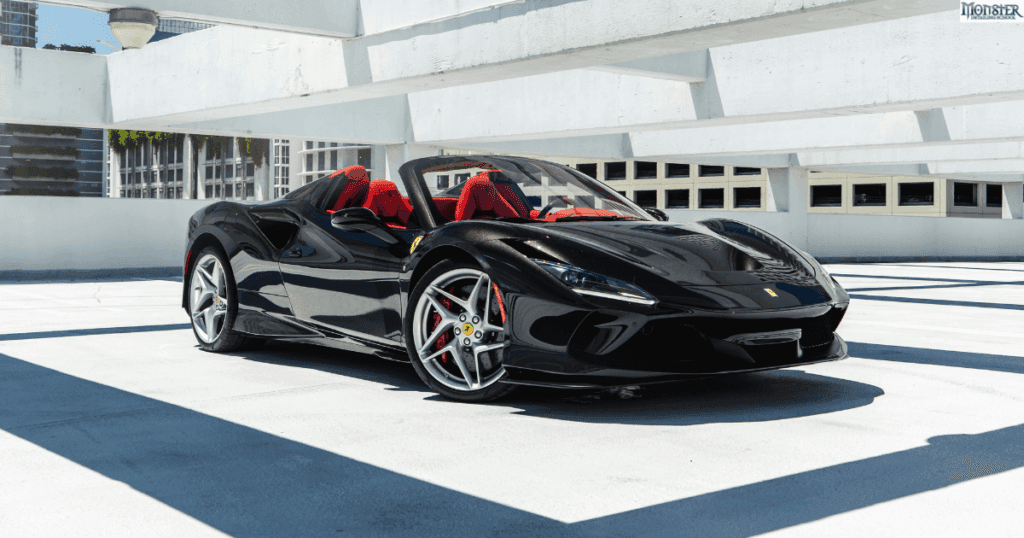
Understanding Self-Healing PPF: How It Works and Why It’s Beneficial

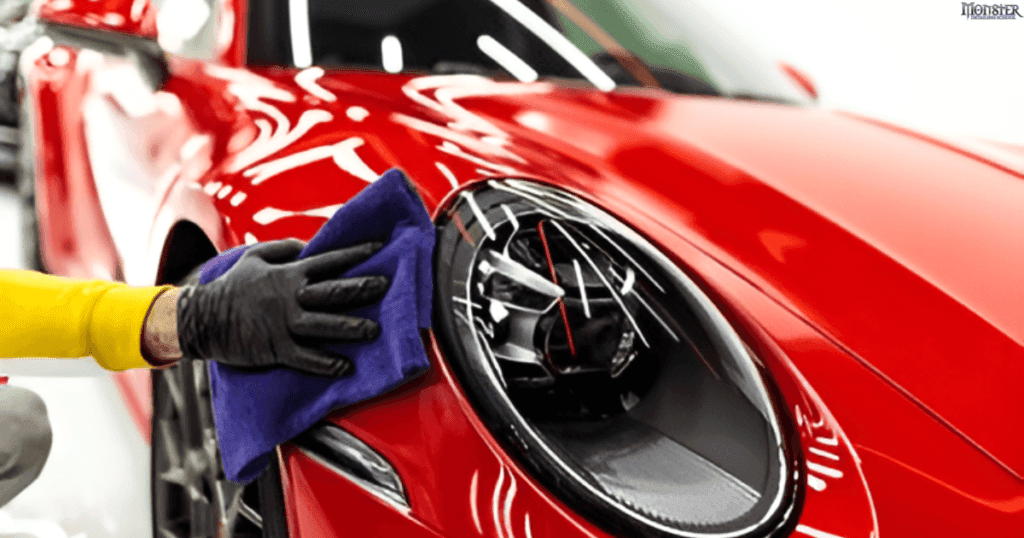
If you’ve ever wondered about the magic behind self-healing paint protection film (PPF), you’re in the right place! At Monster Detailing School, we believe in making car protection simple and effective, and self-healing PPF is one of the coolest innovations out there. Let’s break down what it means, how it works, and why it’s such a game-changer for car owners. What is Self-Healing PPF? Self-healing PPF is a special type of paint protection film designed to protect your car’s paint from everyday damage like scratches, swirl marks, and rock chips. The best part? It can heal itself! That means minor scratches and scuffs disappear over time without you having to do anything. Self-healing PPF keeps your car looking shiny and new, and saves you time and effort on maintenance. Related Topic: Does Paint Protection Film Protect Against the Sun? How Does Self-Healing PPF Work? Self-healing PPF works thanks to its advanced materials. It has a top layer made from an elastomeric polymer that has the ability to return to its original shape. When your car gets a scratch, the PPF’s top layer reacts by “healing” itself—especially when heat is applied. This heat can come from the sun, warm water, or even a heat gun. The heat allows the PPF to smooth out and eliminate light scratches, keeping your car looking flawless. Is PPF Really Self-Healing? Yes! The self-healing feature of PPF is real and very effective. It’s important to note, though, that self-healing works best for minor scratches, such as swirl marks or small surface abrasions. Deeper scratches may not fully disappear, but the PPF will still protect your car from more serious damage. It’s like having an extra layer of armor that keeps your paint job safe while staying almost invisible. Why Choose Self-Healing PPF? Self-healing PPF is perfect for anyone who wants their car to look its best, even with daily driving. Here are some benefits: 1. Less Maintenance: You don’t have to worry about small scratches ruining your car’s look. The film takes care of them on its own. 2. Long-Lasting Shine: Self-healing PPF keeps your car looking freshly polished for years. 3. Protection: It guards against rock chips, minor scratches, and other everyday wear and tear. At Monster Detailing School, we train our students to use high-quality self-healing PPF that’s designed to last. Learning how to apply this film is a smart investment in your skills, allowing you to help car owners keep their vehicles looking great without the constant need for touch-ups or expensive detailing. Related Topic: Waxing vs Ceramic Coating: What Works on PPF? How to Take Care of Self-Healing PPF Self-healing PPF is pretty low maintenance, but to make sure it works its magic for years, here are some simple tips: 1. Wash Regularly: Clean your car with gentle soap and water to keep the PPF clear of dirt. 2. Avoid Harsh Chemicals: Stick to pH-balanced car wash products to protect the film. 3. Apply Heat for Quick Healing: If you notice scratches, you can speed up the healing process by pouring warm water over the film or using a hairdryer on a low setting. Conclusion Self-healing PPF is an amazing way to protect your car while keeping it looking brand new. It’s like having an invisible shield that repairs itself, so you don’t have to worry about the little things. At Monster Detailing School, we not only offer top-quality PPF installation but also provide professional training classes for those interested in learning the skills to install PPF themselves. If you’re interested in learning more, getting self-healing PPF for your car, or joining our PPF training classes, reach out to us today! Liked our blog? Here are more topics you may like:
The Ultimate Guide to Hand Polishing a Car
At Monster Detailing School, we’re dedicated to providing the best practices and advanced training in car detailing. Our mission is to empower students with the skills and knowledge to become leaders in the industry through comprehensive and multilingual training. This guide will show you how to polish your car by hand, covering everything from compounding to cutting, while keeping it simple for anyone to do at home. Let’s dive in and get your car looking like it just rolled off the showroom floor! Why Choose Hand Polishing? Hand polishing is an ideal option for car enthusiasts who want to take a personal approach to maintaining their vehicle’s appearance. While it does require more effort than machine polishing, it’s perfect for removing minor scratches, swirl marks, and restoring dull paint. It’s also a safer choice for beginners, as it reduces the risk of damaging the paint. Related Topic: How Long Does It Take to Polish a Car? Best Way to Polish a Car by Hand To achieve professional results when polishing by hand, follow these steps: 1. Thoroughly Wash and Dry Your Car Start by washing your car with a quality car shampoo. Make sure to remove all dirt, grime, and debris to prevent scratches during the polishing process. Dry the car with a microfiber towel. 2. Inspect the Paint Examine the paintwork to identify areas with scratches, swirl marks, or oxidation. Knowing the condition of the paint will help you determine the appropriate level of polishing needed. 3. Select the Right Polish Use a medium-cut polish for a balance between removing imperfections and refining the paint. Choose a hand friendly product that can be applied using a foam or microfiber applicator. 4. Apply the Polish with an Applicator Pad Work in small sections, using a foam or microfiber applicator pad to apply the polish in circular motions. Apply even pressure to ensure consistent results across the entire surface. 5. Buff Off the Residue After polishing each section, use a clean microfiber cloth to remove any residue. This will help reveal the improved shine and clarity. 6. Apply a Protective Wax or Sealant Finish off the process with a wax or sealant to protect the polished surface and maintain the shine. Related Topic: Should You Wax a Car After Polishing? Can I Polish a Car by Hand? Absolutely! Hand polishing is not only possible but also effective for minor imperfections and giving your car that extra glow. It’s a great choice for DIY car enthusiasts who prefer a hands-on approach. For more severe paint issues, however, using a machine polisher may deliver quicker and more dramatic results. How to Compound and Polish a Car by Hand Compounding and polishing go hand-in-hand when it comes to restoring a car’s paintwork. Here’s how to do both effectively: Start with a compound if your car has deeper scratches or noticeable oxidation. Compounds are more abrasive than polishes and help remove significant imperfections. Apply the compound using a foam pad and work it into small sections with firm pressure in back-and-forth or circular motions. Use a microfiber towel to remove any remaining compound and move on to the next area. After compounding, switch to a polish to smooth the surface further and bring out the shine. Related Topic: Hand vs. Machine Polishing: Which One Reigns Supreme? How to Cut and Polish a Car by Hand Cutting is a more intensive form of paint correction that removes a thin layer of clear coat to eliminate defects. Follow these steps for a successful cut and polish: If there are significant swirl marks or dullness, use a cutting compound. Apply it with consistent pressure and circular motions. After cutting, refine the finish with a polishing product to smooth the paint and enhance gloss. Use a microfiber cloth to remove polish residue, then apply a wax or sealant for lasting protection. How to Polish a Car by Hand at Home Polishing at home is a satisfying way to maintain your car’s appearance. Here’s a quick guide: Car shampoo, microfiber towels, polish, foam applicator pads, and wax or sealant. Wash the car to remove dirt and avoid scratches. Work on small sections at a time, applying the polish in circular motions. Use a microfiber cloth to reveal the improved paint finish. Finish with a protective layer to preserve the shine. Related Topic: Is Ceramic Coating Better Than Waxing? Why Train with Monster Detailing School? At Monster Detailing, we don’t just show you how to polish a car by hand—we equip you with the skills and techniques needed to become an expert detailer. Our training covers the latest practices and technology, ensuring our students stand out in the detailing industry. With multilingual instruction and sustainable methods, you’ll learn to deliver top quality services effectively. Whether it’s hand polishing or advanced detailing, we prepare you to offer exceptional results to your clients. FAQs 1. Is hand polishing safe for all cars?Yes, hand polishing is generally safe for all types of cars, including classic vehicles. It’s a gentle method that reduces the risk of damage, especially for beginners. 2. How often should I polish my car?Polish your car once or twice a year, depending on the paint’s condition. Frequent polishing can thin the clear coat, so it’s best to do it only when needed. 3. Can hand polishing remove deep scratches?Hand polishing can reduce the appearance of minor scratches and swirl marks. For deeper scratches, a cutting compound or machine polisher may be necessary. 4. Why use wax after polishing?Wax provides a protective layer, sealing in the shine and helping to repel dirt and contaminants. Related topic: Orbital vs. Rotary Polisher: Which is Best for Your Car Detailing Needs? Conclusion Hand polishing a car is more than just a DIY project; it’s a way to keep your vehicle in pristine condition while enjoying the satisfaction of a job well done. At Monster Detailing School, we’re committed to teaching the best practices and the most advanced techniques, equipping you with the knowledge to
Orbital vs. Rotary Polisher: Which is Best for Your Car Detailing Needs?
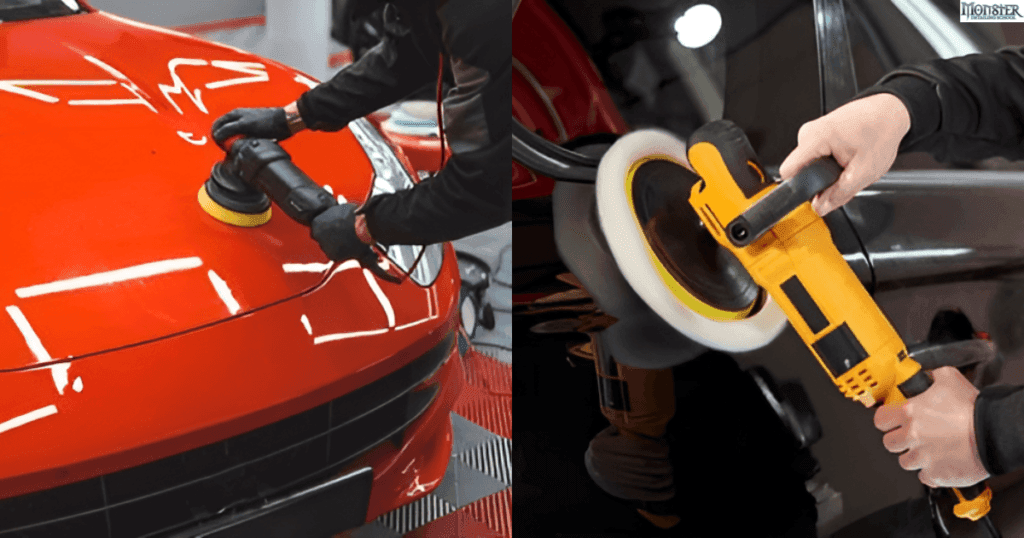
When it comes to polishing a car, choosing the right polisher can make all the difference in achieving that showroom-quality shine. Two common types of polishers are the rotary polisher and the orbital polisher also known as the random orbital or dual action polisher. In this guide, we’ll go through the differences between orbital and rotary polishers, their advantages and disadvantages, and which one might be the best choice for your detailing needs. At Monster Detailing School, we offer comprehensive training on using these tools to help our students excel in the industry, utilizing the most advanced techniques and sustainable practices. What is a Rotary Polisher? A rotary polisher is a powerful tool that uses a direct-drive system to rotate the pad in a circular motion. This type of polisher is known for its ability to correct heavy paint defects quickly, making it a favorite choice among professional detailers. Pros of Rotary Polishers: 1. Fast and Effective: The powerful circular motion can quickly correct deep scratches, heavy oxidation, and severe swirl marks. 2. Great for Heavy Correction: Ideal for vehicles with significant paint damage or neglected finishes. 3. Controlled Cutting Power: Provides more direct control over the polishing process, which can be advantageous for experienced users. Cons of Rotary Polishers: 1. Higher Risk of Damage: If not used properly, a rotary polisher can burn through the paint or leave holograms, especially in the hands of a beginner. 2. Not Ideal for Beginners: It requires more skill to handle and can be challenging to master without proper training. 3. Produces More Heat: The direct-drive motion generates more heat, increasing the risk of paint damage. Related Blog: Hand vs. Machine Polishing: Which One Reigns Supreme? What is an Orbital Polisher? An orbital polisher, also known as a random orbital or dual action polisher, moves in a more complex pattern, combining both a circular and orbital motion. The dual action of the pad mimics the natural movement of the human hand, making it a safer option for beginners. Pros of Orbital Polishers: 1. Safe for Beginners: The random orbital motion reduces the risk of paint damage, making it more user-friendly. 2. Reduces Heat Buildup: The dual-action movement generates less heat, which helps prevent burning the paint. 3. Ideal for Finishing Touches: Perfect for light to moderate paint correction and applying finishing polishes. Cons of Orbital Polishers: 1. Less Cutting Power: May struggle with heavy paint correction or deep scratches compared to a rotary polisher. 2. Takes More Time: Since it’s less aggressive, it may take longer to achieve the desired results, especially on heavily damaged paint. Related Blog: Should You Wax a Car After Polishing? Which Polisher is Best for Your Needs? Choosing between a rotary and an orbital polisher largely depends on your experience level, the condition of the vehicle’s paint, and your detailing goals. For Beginners: An orbital polisher (random orbital or dual action) is generally the best choice. The safer, less aggressive motion allows beginners to get the hang of polishing without worrying about damaging the paint. It’s perfect for everyday car care, light paint correction, and applying waxes or sealants. For Professionals: A rotary polisher is ideal for professionals who need the power and speed to correct heavily damaged paint. However, it does require skill and proper training to avoid mistakes. At Monster Detailing School, we train students on both rotary and orbital polishers, ensuring they have the expertise to handle any situation with confidence. Related Blog: How Long Does It Take to Polish a Car? Why Training Matters While using a polisher may seem straightforward, mastering the techniques is crucial for achieving the best results. At Monster Detailing School, we emphasize the importance of training with both rotary and orbital polishers. Our comprehensive courses provide hands-on experience with the latest technology, ensuring students understand the strengths and limitations of each tool. Our training programs are designed to help students become leaders in the detailing industry. We focus on: 1. Best Practices: Learn the safest and most effective polishing techniques. 2. Advanced Technology: Use the latest tools and products to stay ahead of industry trends. 3. Multilingual Instruction: Our training is accessible to a global audience, with multilingual programs to ensure everyone can benefit. 4. Sustainability: Adopt eco-friendly practices that not only deliver excellent results but also reduce environmental impact. Related Blog: How Much Does Car Polishing and Buffing Cost? When to Use a Rotary Polisher vs. an Orbital Polisher To get the best out of these tools, it’s essential to understand when to use each type: 1. Rotary Polisher: Ideal for heavy paint correction. Use this tool if the vehicle has deep scratches, oxidation, or if you need to remove sanding marks. 2. Orbital Polisher: Best for light to moderate paint correction, swirl removal, and applying polish or wax. It’s also suitable for maintaining the finish after using a rotary polisher. Conclusion Choosing between a rotary and an orbital polisher comes down to the job at hand and the detailer’s skill level. Rotary polishers are powerful and suitable for heavy correction, but they require experience to use safely. Orbital polishers, on the other hand, are beginner-friendly and perfect for light to moderate paint correction. In our auto detailing classes, we’re dedicated to offering the best practices and advanced technology to our students, ensuring they become leaders in the detailing industry. Our comprehensive, multilingual car detailing training programs equip students to deliver high-quality detailing services in a sustainable and effective manner. Whether you’re new to detailing or looking to enhance your skills, our training will help you master the art of polishing and become a true expert.
Is Ceramic Coating Better Than Waxing?
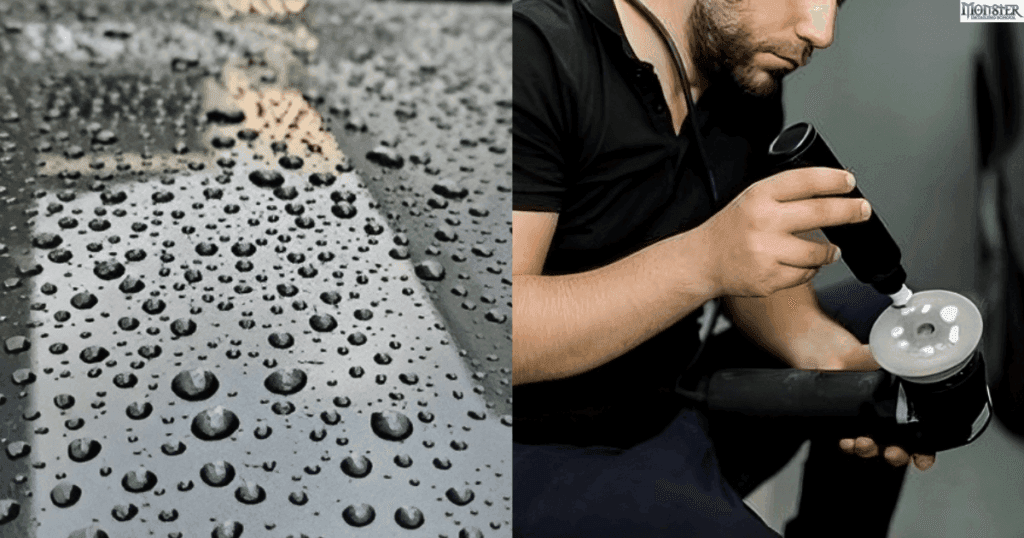
When it comes to maintaining the appearance of your vehicle, the right protection can make all the difference. While waxing has been a popular choice for years, ceramic coating is gaining traction as a superior option. But is ceramic coating really better than waxing? Let’s break down the differences, benefits, and drawbacks to help you make an informed decision. Plus, if you’re looking to learn more about the art of detailing, Monster Detailing School offers training programs that teach students everything about modern vehicle care, including ceramic coating techniques. Related Blog: Waxing vs Ceramic Coating: What Works on PPF? What is Waxing? Waxing has been a go-to method for protecting car paint for decades. It involves applying a layer of car wax, usually made from natural carnauba wax or synthetic polymers, onto the car’s surface. The purpose of waxing is to create a protective barrier against contaminants, UV rays, and minor scratches while giving the car a shiny, glossy finish. However, waxing needs to be done regularly (every few months) to maintain its effectiveness. Pros of Waxing: Cons of Waxing: Related Blog: Should You Wax a Car After Polishing? What is Ceramic Coating? Ceramic coating, on the other hand, is a liquid polymer applied to the exterior of a vehicle. The coating chemically bonds with the factory paint, forming a protective layer that is much stronger than wax. This layer shields the car’s paint from UV rays, dirt, bird droppings, and even some scratches. Unlike waxing, ceramic coating provides long-lasting protection that can last for years. Pros of Ceramic Coating: Cons of Ceramic Coating: Read More: How Much Does Car Polishing and Buffing Cost? Key Differences Between Ceramic Coating and Waxing Now that you have a basic understanding of both options, let’s dive deeper into the key differences that set ceramic coating apart from traditional waxing. 1. Durability: Lasts a few months at best, requiring regular reapplication to maintain its protective qualities. Wax can also melt or wash away when exposed to heat and rain. Offers long-term protection, lasting several years with minimal maintenance. It doesn’t degrade as quickly under harsh conditions, making it ideal for those who want a lasting solution. 2. Protection Level: Provides a basic layer of protection against minor contaminants but lacks resistance to chemicals, UV rays, and abrasion. Creates a much harder and more resistant layer on the car’s surface. It guards against bird droppings, tree sap, road salt, and other harsh elements that could damage the paint. 3. Ease of Maintenance: Requires frequent maintenance to keep the car looking shiny and protected. You will need to wax your car every few months to keep it in top condition. Reduces the need for frequent maintenance since the hydrophobic properties prevent dirt, grime, and water from sticking to the surface. Routine washes are enough to keep the car looking clean. 4. Cost: Lower initial cost but adds up over time due to frequent applications. Higher initial investment but can save money in the long run due to its durability. 5. Application Process: Easier to apply and can be done by almost anyone. It doesn’t require much preparation, other than cleaning the car. Requires a more detailed application process. For best results, the car’s paint should be corrected to remove any imperfections before applying the ceramic coating. Read More: Hand vs. Machine Polishing: Which One Reigns Supreme? Why Ceramic Coating is Better for Long-Term Protection If you’re looking for a solution that lasts longer and offers more comprehensive protection, ceramic coating is the way to go. It provides a much stronger barrier against environmental contaminants, scratches, and UV damage, ensuring that your car maintains its pristine condition for years to come. The hydrophobic properties of ceramic coating also make it easier to clean the car, as dirt and water slide off effortlessly. Ceramic coating is particularly beneficial if you live in an area with harsh weather conditions, like extreme heat, heavy rainfall, or road salt. The protective layer helps to shield your vehicle from damage caused by these elements, unlike wax, which wears off quickly and needs frequent reapplication. The Best Option for You When deciding between ceramic coating and waxing, consider your budget, lifestyle, and the level of maintenance you’re willing to perform. If you prefer a simple, budget-friendly option and don’t mind waxing your car every few months, then waxing may be a suitable choice. However, if you want a more durable, low-maintenance solution that offers superior protection and gloss, ceramic coating is the better option. Learn How to Apply Ceramic Coating with Monster Detailing School If you’re interested in learning more about ceramic coating and how to professionally apply it, Monster Detailing School is the perfect place to start. Our training programs teach students the ins and outs of modern detailing, from basic window tint training to advanced PPF training & ceramic coating applications. Whether you’re a beginner looking to start a career in auto detailing or an enthusiast who wants to take your skills to the next level, Monster Detailing School has you covered. Our hands-on training and expert instructors will guide you through every step of the process, ensuring you master the art of ceramic coating and detailing. Plus, our programs are designed to fit different schedules, so you can learn at your own pace. Read More; How Much to Tip a Car Detailer Conclusion While both waxing and ceramic coating have their place in car maintenance, ceramic coating stands out as the superior option for long-term protection, durability, and ease of maintenance. Waxing may be suitable for those who prefer a short-term shine or are on a tighter budget, but if you want to protect your car from the elements and maintain its beauty for years, ceramic coating is the way to go. Monster Detailing School not only offers expert detailing services but also provides the best auto detailing training programs for those interested in learning about modern vehicle care. Join us to become a professional detailer and master the
Hand vs. Machine Polishing: Which One Reigns Supreme?
When it comes to car detailing, polishing is a crucial step that helps restore your vehicle’s shine and smooth out imperfections. But the big question is: should you polish by hand or use a machine? Both methods have their pros and cons, and each can be suitable for different situations. In this blog, we’ll explore the differences between hand and machine polishing, helping you decide which technique is best for your needs. At Monster Detailing School, we’re committed to offering the best practices and the most advanced technology to our students. Our comprehensive and multilingual training ensures that our students become leaders in the detailing industry, equipped to provide the highest quality services in a sustainable and effective manner. What’s Involved in the Car Polishing Process? Polishing is a process used to enhance the appearance of a car’s paint by removing scratches, swirl marks, oxidation, and other minor imperfections. It involves using a polishing compound, which is applied to the car’s surface to smooth out imperfections and bring back the paint’s gloss. There are two main methods for polishing a car: hand polishing and machine polishing. Let’s break down each technique. Related Blog: How Long Does It Take to Polish a Car? Hand Polishing Hand polishing is done using a cloth or foam applicator pad to apply a polishing compound directly to the car’s paint. It’s a traditional approach that has been used for years and is still preferred by some car enthusiasts. Pros of Hand Polishing 1. Precise Control: Hand polishing gives you complete control over the amount of pressure you apply and the areas you focus on. This is especially helpful for intricate or delicate areas where machine polishing may not reach easily. 2. Gentle on the Paint: Hand polishing is less aggressive than machine polishing, making it a good choice for surfaces with thin or delicate paint. It reduces the risk of accidentally damaging the paint or clear coat. 3. Great for Small Areas: When you need to polish small or tight areas, such as around badges or door handles, hand polishing allows you to target those spots with precision. 4. No Special Equipment Required: Hand polishing only requires basic tools like a microfiber cloth or foam pad, which makes it an accessible option for beginners or those who don’t have access to a machine polisher. Cons of Hand Polishing 1. Time-Consuming: One of the biggest drawbacks of hand polishing is that it takes much longer than using a machine. You’ll need to put in a lot of effort to achieve noticeable results. 2. Inconsistent Results: Since hand polishing relies on your physical effort, it can be difficult to maintain consistent pressure, leading to uneven results. It’s not ideal for tackling deeper scratches or more extensive paint corrections. 3. Less Effective for Heavy Damage: Hand polishing may not be powerful enough to remove deep scratches, heavy swirl marks, or severe oxidation. In these cases, machine polishing is often more effective. Related Blog: How Much Does Car Polishing and Buffing Cost? Machine Polishing Machine polishing uses an electric or battery-powered polisher with a rotating or oscillating pad to apply the polishing compound. This method is popular among professional detailers because it delivers faster and more consistent results. Pros of Machine Polishing 1. Faster Results: Machine polishing is significantly faster than hand polishing, making it suitable for larger surfaces or when you need to complete a detailing job quickly. 2. More Effective for Paint Correction: Machine polishers are powerful tools that can remove deep scratches, swirl marks, and heavy oxidation more effectively than hand polishing. 3. Consistent Pressure: Since the machine does the work, it provides a consistent level of pressure across the surface, leading to more uniform results. 4. Various Pad and Compound Options: Machine polishers come with different types of pads and compounds, allowing you to choose the right combination for your specific needs, from light polishing to heavy paint correction. Cons of Machine Polishing 1. Risk of Paint Damage: Machine polishers are more aggressive than hand polishing, and if used incorrectly, they can damage the paint or clear coat. It’s important to understand how to use the machine properly to avoid this. 2. Expensive Equipment: Quality machine polishers can be expensive, which may not be ideal for those on a tight budget. Additionally, different polishing pads and compounds add to the overall cost. 3. Requires Skill and Practice: Using a machine polisher effectively requires some level of skill and experience. Beginners may need training to avoid mistakes that could harm the paint. Related Blog: Should You Wax a Car After Polishing? Hand vs. Machine Polishing Deciding whether to use hand or machine polishing depends on several factors, including the condition of the car’s paint, the level of correction needed, and your experience with detailing. When to Choose Hand Polishing 1. Minor Imperfections: If your car’s paint has only light scratches or minor swirl marks, hand polishing can effectively restore the shine without needing a machine. 2. Delicate or Thin Paint: Hand polishing is ideal for vehicles with thin paint or delicate finishes, as it’s less likely to cause damage. 3. Small or Hard-to-Reach Areas: Hand polishing is the better choice for tight spots or detailed areas that a machine can’t reach. Read More: How Much to Tip a Car Detailer Conclusion Ultimately, there is no clear winner between hand and machine polishing because the best choice depends on your specific needs. Hand polishing is great for delicate areas and light correction, while machine polishing is the go-to for deeper paint corrections and faster results. For those serious about car detailing training, mastering both techniques will give you the versatility to tackle any job with confidence. At Monster Detailing School, we provide the training you need to become a leader in the industry, using the best practices and cutting-edge technology to achieve stunning results.
Does Paint Protection Film Protect Against the Sun?
If you love your car, keeping it looking shiny and new is probably a top priority. One of the best ways to protect the car’s paint is by using Paint Protection Film (PPF). It’s a popular choice among car enthusiasts and professionals alike, but a common question that comes up is whether PPF can protect the car’s paint from sun damage. In this blog, we will explore what PPF is, how it works, and whether it effectively shields your car from the harmful effects of the sun. How Does the Sun Damage Car Paint? Before we get into whether PPF protects against the sun, it’s important to understand how the sun can harm your car’s paint. The sun emits ultraviolet (UV) rays that can damage the paint over time. Here are a few ways UV rays can harm your car’s exterior: 1. Fading: Continuous exposure to sunlight can cause the paint to fade, making it look dull and lifeless. The vibrant colors may lose their brightness, and metallic paints can lose their shine. 2. Oxidation: The sun’s rays can also cause oxidation, which happens when the paint starts to break down and forms a chalky layer on the surface. This process can make the car look older and neglected. 3. Peeling and Cracking: In extreme cases, prolonged exposure to UV rays can cause the paint to crack or peel off. This is more likely to happen if the car’s clear coat has already been damaged or worn away. Related Blog: How to Wash a Car with Paint Protection Film? Does Paint Protection Film Block UV Rays? The good news is that Paint Protection Film does offer some protection against the sun’s harmful UV rays. Here’s how: 1. UV Resistance: Many high-quality PPFs are designed with UV-resistant materials. This means that they can block some of the UV rays from reaching the paint, reducing the risk of fading and oxidation. 2. Prevents Clear Coat Damage: Since PPF acts as a barrier between the sun and the car’s clear coat, it can help prevent the damage that UV rays cause to the top layer of the paint. This layer is essential because it protects the colored paint underneath. 3. Self-Healing Properties: Some modern PPFs have self-healing properties that allow minor scratches to disappear when exposed to heat. While this doesn’t directly relate to sun protection, it does mean that the film remains clear and doesn’t degrade from small surface imperfections. How Effective is PPF Against Sun Damage? While PPF does provide some level of UV protection, it’s important to note that it is not a complete solution for sun damage. Here’s why: 1. Limited UV Blocking: PPF can block some UV rays, but it may not block them all. It offers a layer of defense, but the paint underneath may still be exposed to some level of UV radiation over time. This means that while the film does help reduce the rate of fading and oxidation, it may not entirely prevent it. 2. Yellowing Over Time: If a low-quality PPF is used, it may turn yellow after prolonged exposure to the sun. This can make the car look less appealing. High-quality PPFs are designed to resist yellowing, so it’s essential to choose the right product. 3. Regular Maintenance is Still Needed: Even with PPF, it is important to regularly clean and maintain your car’s exterior to keep it looking its best. Applying a protective wax or sealant over the PPF can provide extra UV protection. Read More: Should You Wax a Car After Polishing? How to Enhance Sun Protection for Your Car If you want to maximize protection against sun damage, here are some additional steps you can take alongside applying PPF: 1. Use Ceramic Coating: Ceramic coating can be applied on top of PPF for an extra layer of protection. It offers additional UV resistance and helps keep the car’s surface looking glossy. Ceramic coating creates a hydrophobic layer, which repels water and dirt, making it easier to keep the car clean. 2. Park in the Shade: Whenever possible, park your car in a shaded area or use a car cover. This simple step can significantly reduce the amount of direct sunlight that hits your vehicle. 3. Apply UV Protection Spray: There are sprays specifically designed to provide UV protection for car surfaces. These sprays can be applied periodically to help block UV rays and keep the paint from fading. 4. Tinted Windows: While this doesn’t protect the paint directly, having tinted windows can help reduce the amount of heat inside the car, which can also help prevent damage to interior surfaces like the dashboard and seats. Is PPF Worth It? So, does Paint Protection Film protect against the sun? The answer is yes, but with some limitations. PPF does provide a level of UV protection, which helps prevent fading, oxidation, and clear coat damage. However, it may not completely block all UV rays. Combining PPF with other protective measures like ceramic coating and UV sprays will offer the best defense against sun damage. For car owners who want to keep their vehicles in top condition, PPF is definitely worth considering. It offers protection against more than just the sun, including scratches, rock chips, and chemical stains, making it a versatile solution for car care. Conclusion Paint Protection Film can help protect your car from sun damage, but it’s not a standalone solution. It acts as a barrier to reduce the effects of UV rays on your car’s paint, helping to maintain its shine and prevent fading. For the best results, combine PPF with other protective measures like ceramic coating and regular maintenance. At Monster Detailing School, we specialize in providing car detailing training courses & applying high-quality PPF that offers superior protection against sun damage and other hazards. Contact us today to learn more about our services and how we can help keep your car looking its best. Related Topics: How to Apply Paint Protection Film (PPF)How Long Does
How Long Does Paint Protection Film Last?
Paint Protection Film (PPF) is one of the best ways to keep your car’s paint job looking fresh and new. Whether you just bought a new vehicle or want to extend the life of your current car’s exterior, PPF is a popular choice. But how long does paint protection film really last? In this blog, we’ll look into everything you need to know about the longevity of PPF and how you can make it last even longer. What is a Paint Protection Film? It is a thin, transparent film of polyester to coat the surface of your car’s paint, generally called PPF. Its primary purpose is to protect the paint of your car from environmental elements like bugs, bird droppings, UV rays, and road debris. It’s a nearly undetectable barrier that keeps the vehicle’s original finish, and more and more car owners are using it. Related Blog: How to Apply Paint Protection Film (PPF) Does Paint Protection Films Last Long? The lifespan of paint protection film can vary depending on several factors such as the quality of the film, the installation process, and how well it’s maintained. On average, high-quality PPF can last anywhere between 5 to 10 years. Some premium brands may even offer warranties for up to 10 years, which indicates their confidence in the product’s durability. But not every PPF is made equally. Cheaper films might not live as long; they usually only last three to five years. The length of the film is also significantly influenced by the environment your car is subjected to. The PPF may not last as long in cars that are regularly exposed to intense sunshine, severe weather, or a lot of road dirt. Factors That Affect the Longevity of Paint Protection Film 1. Quality of the Film The quality of the paint protection film you choose is the most important factor that determines its lifespan. High-quality films are engineered to withstand a variety of environmental factors, and they come with UV inhibitors that prevent the film from yellowing over time. Premium films are also more resistant to scratches, chips, and peeling compared to cheaper alternatives. 2. Installation Proper installation is key to ensuring the longevity of your PPF. A professional installer will make sure the film is applied evenly without bubbles or creases, and they’ll ensure that it adheres properly to all parts of your vehicle. A poor installation can lead to premature peeling, bubbling, and even failure of the film, reducing its lifespan significantly. 3. Maintenance and Care How well you care for your paint protection film plays a huge role in how long it lasts. Regular washing and proper cleaning methods will help maintain the clarity and effectiveness of the film. Avoid using harsh chemicals or abrasive tools, as these can scratch or damage the surface of the film. Keeping your car clean not only helps extend the life of the film but also keeps your vehicle looking its best. 4. Environmental Conditions Cars that are exposed to extreme weather conditions, such as excessive heat, freezing temperatures, or heavy rain, will put more wear on the PPF. In areas with a lot of road salt or sand, the film may degrade faster. If your car is frequently exposed to the elements, it’s important to keep a closer eye on the condition of your PPF and have it inspected regularly. 5. Driving Habits Your driving habits can also influence how long the paint protection film lasts. If you frequently drive on gravel roads, through construction zones, or at high speeds, your vehicle’s paint will be more exposed to damage from road dirt and other hazards. This can cause the film to wear down faster in those high-impact areas. Related Blog: How to Wash a Car with Paint Protection Film? How to Make Paint Protection Film Last Longer While the average lifespan of PPF is 5 to 10 years, there are steps you can take to make it last even longer. Here are some tips to help you extend the life of your paint protection film: 1. Regular Cleaning Regularly wash your vehicle with mild soap and water to remove dirt, grime, and other contaminants. Avoid using harsh chemicals or waxes, as these can damage the film over time. Using a microfiber cloth to gently clean the film will help prevent scratches and other surface damage. 2. Ceramic Coating Over PPF Some car owners choose to apply a ceramic coating over their PPF for added protection. Ceramic coatings provide an extra layer of defense against environmental factors and can help prolong the life of your paint protection film. The ceramic coating also makes it easier to clean the vehicle, as it repels dirt and water more effectively. Related Blog: Waxing vs Ceramic Coating: What Works on PPF? 3. Avoid Automatic Car Washes Automatic car washes often use stiff brushes and abrasive materials that can damage PPF. It’s best to hand wash your car to ensure the film stays in good condition. If you do need to use a car wash, opt for a touchless wash that uses only water and soap to clean your vehicle. 4. Inspect the Film Regularly Regularly inspect your paint protection film for any signs of wear, peeling, or damage. If you notice any issues, it’s a good idea to have them addressed right away. Most small issues can be repaired without having to replace the entire film, saving you time and money in the long run. 5. Park in a Garage or Shaded Area To lessen UV exposure, put your automobile in a garage or other covered spot whenever you can. Regular exposure to direct sunlight may eventually cause the film to break down or turn yellow. Both the paint and the PPF will be better protected if you keep your automobile out of the sun. Signs It’s Time to Replace Paint Protection Film Even with proper care and maintenance, there will eventually come a time when your PPF needs to be replaced. Here are
Waxing vs Ceramic Coating: What Works on PPF?

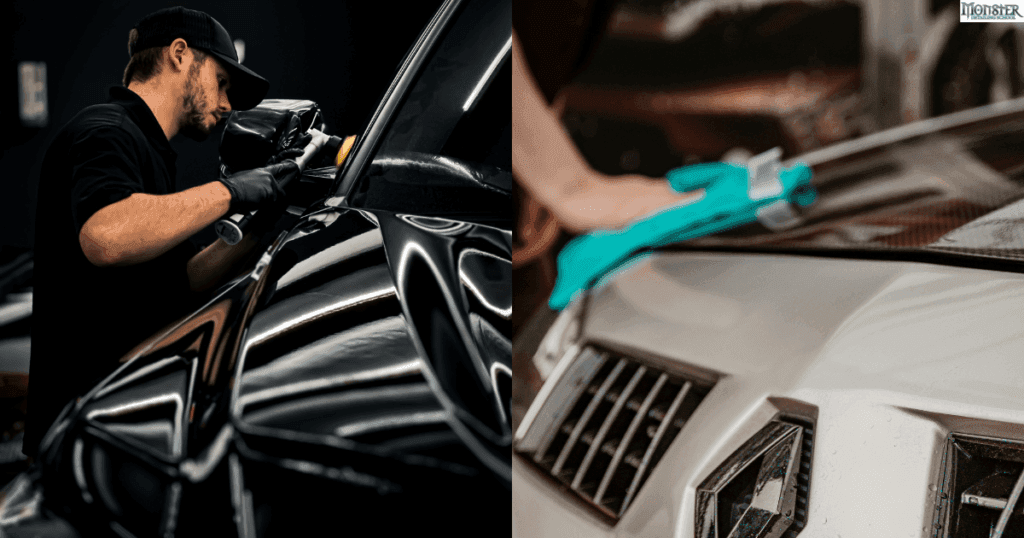
When it comes to car detailing, keeping your vehicle’s exterior looking pristine is one of the top priorities for many car enthusiasts and owners. Paint Protection Film (PPF) is an excellent solution for protecting your vehicle’s paint from everyday wear and tear, scratches, rock chips, and more. But if you’re wondering whether you can wax or ceramic coat your PPF for an added layer of protection, the short answer is yes, but there are some key details to consider. In this blog, we’ll dive into the specifics of waxing and ceramic coating Paint Protection Film. We’ll explore how each method works, the benefits, and what you need to keep in mind to maintain the effectiveness and longevity of your PPF. Waxing Paint Protection Film: Is It Necessary? Waxing has been a go to method for car owners for many years to add shine and a layer of protection to their vehicle’s paint. While it’s entirely possible to wax PPF, it may not be necessary in every case. Here are the key factors to consider: 1. PPF’s Natural Shine PPF is designed to be glossy and protective by itself. Many high-quality films already come with a hydrophobic top layer, which repels water and dirt, much like wax. So, adding wax may not enhance the appearance or protection significantly. 2. Wax Type Matters It’s crucial to select a wax that is safe for plastic surfaces if you decide to wax your PPF. The ideal choice for PPF might not be traditional carnauba waxes, which are effective on bare paint. They might potentially hide the film’s surface or block its ability to mend itself… Instead, it’s better to use synthetic waxes or sealants designed for PPF, as they are specifically formulated not to damage or dull the film. 3. Maintenance Boost Waxing can still act as an extra defense against impurities such as bird droppings, bug dust, and tree sap. A wax layer can make it even simpler to remove dirt and preserve the film’s beauty, even though PPF is already resistant to pollutants. Related Blog: Should You Wax a Car After Polishing? Ceramic Coating Over PPF: The Best of Both Worlds? Ceramic coating is a more modern and long lasting solution than traditional wax. It’s a liquid polymer that chemically bonds to the surface it’s applied to, creating a hardened layer that offers superior protection against the elements. It’s hydrophobic, meaning it repels water and keeps your vehicle cleaner for longer. But how does it work with PPF? 1. Enhanced Protection While PPF alone provides excellent protection against physical damage like scratches and chips, adding a ceramic coating can take the protection to the next level. Ceramic coatings help shield your car from UV rays, preventing discoloration or fading over time. Additionally, the hydrophobic properties make it easier to clean your car as water, dirt, and dirt slide right off. 2. Compatibility The good news is that most ceramic coatings are compatible with Paint Protection Films. However, not all ceramic coatings are created equal. It’s important to use a ceramic coating that is specifically designed for use over PPF. These coatings are engineered to work with the adhesive nature of the film and not hinder its self-healing abilities. 3. Gloss and Hydrophobicity Ceramic coatings can add an extra layer of gloss to the already shiny surface of PPF, giving your car a wet-look finish that many car enthusiasts love. Moreover, the hydrophobic properties make it more difficult for contaminants to stick to the film, reducing the amount of time you’ll spend washing and maintaining your car. Read More: Paint Protection Film: Paint Safety & Adhesive Removal Guide Steps to Properly Wax or Ceramic Coat PPF If you decide to enhance your PPF with either wax or a ceramic coating, it’s important to follow the right process to ensure you don’t compromise the film’s integrity. 1. Surface Preparation Before applying any wax or ceramic coating, the PPF must be completely clean and dry. Dirt, dust, and other particles can become trapped under the wax or coating, leading to a less than perfect finish. 2. Applying Wax If you choose to wax your PPF: 3. Applying Ceramic Coating If ceramic coating is your choice: Read More: How to Apply Paint Protection Film (PPF) Long-Term Care for PPF with Wax or Ceramic Coating Once you’ve applied wax or ceramic coating to your PPF, proper care and maintenance are key to ensuring longevity and effectiveness. 1. Regular Washing Stick to regular washing with a pH-neutral soap. Avoid harsh chemicals or degreasers, as these can break down the wax or ceramic coating over time. 2. Avoid Abrasives Avoid using abrasive brushes or sponges when washing your car. Opt for soft microfiber towels or wash dirts to prevent scratching the film or damaging the coating. 3. Reapplication Wax will need to be reapplied every few months to maintain its protection and shine. On the other hand, ceramic coatings can last for several years but may need occasional maintenance to preserve their hydrophobic properties. Related Topic: How to Wash a Car with Paint Protection Film? Conclusion You can improve your car’s protection and shine by waxing or ceramic coating its paint protection film. Ceramic coating offers a more robust, long-lasting option, even while waxing can add a layer of temporary protection. Your needs and the amount of time and effort you’re prepared to put into keeping your automobile looking nice will determine which option is best for you. For those looking for the ultimate protection, combining PPF with a ceramic coating is often considered the best of both worlds, offering physical protection from scratches and chips along with the hydrophobic and UV-resistant properties of a ceramic coating. Whether you opt for wax or ceramic coating, always ensure you are using products specifically designed for PPF, and follow the proper application techniques to maintain the integrity of the film and your vehicle’s finish. Monster Detailing School is providing following courses:
Paint Protection Film: Paint Safety & Adhesive Removal Guide

If you love your car, chances are you’re looking for ways to keep it looking great for as long as possible. One of the most popular options for protecting the exterior of your car is Paint Protection Film (PPF). But there are a lot of questions that come with it—like whether it might damage your paint or how to handle that sticky adhesive when it comes time to remove it. In this blog, we’re going to answer these questions in simple terms to make sure you feel confident about PPF. Does Paint Protection Film Damage Paint? The short answer is: no, paint protection film does not damage your car’s paint. Instead, it helps preserve it by adding a layer of protection against all the elements that can damage it. Think of PPF as a shield for your car, it’s designed to keep scratches, small stones, UV rays, and other everyday wear and tear from damaging the beautiful paint underneath. What Paint Protection Film is Safe for Your Paint 1. Quality Products Matter: The most important factor to keep in mind is the quality of the film. High-quality PPF is made with advanced materials designed to be gentle on your car’s paint while being tough against scratches and chips. It’s like putting a high-quality screen protector on your phone. It protects without leaving a mark. 2. Expert Installation is Key: Another important factor is the installation process. If applied by an experienced professional, the risk of damage is practically zero. Good installers know how to prepare the car’s surface properly, ensuring that the film sticks smoothly without any bubbles or rough spots. This process is essential because, when done correctly, the film will be easy to remove without causing any damage. Related Blog: How to Apply Paint Protection Film (PPF) When Problems Can Happen While PPF generally doesn’t cause damage, there are a few things that can go wrong if the process isn’t done properly: 1. Low-Quality Film: If a low-quality film is used, it may not adhere properly or might leave behind a sticky film, which can be tough to clean. Poor quality films can also be too rigid or hard to remove, which could lead to damage if you try to take it off. 2. Incorrect Installation: If the PPF isn’t installed by a professional, there’s a risk of damaging the paint. Inexperienced technicians could stretch the film excessively or fail to properly clean the vehicle before applying it, which could cause problems when you try to remove it. 3. Harsh Removal: Trying to pull the film off without proper techniques or tools can lead to paint peeling. We’ll go over the right way to remove it later in this blog. Related Blog: How to Wash a Car with Paint Protection Film? How to Remove Paint Protection Film Adhesive If you’ve had your PPF on for a while, you may eventually need to remove it. Maybe it’s time for a new film, or you’re ready for a different kind of protection. Whatever the reason, one of the trickiest parts of removing PPF can be dealing with the leftover adhesive. If it’s not done right, the sticky film can be a real pain. Let’s look at how you can safely remove that adhesive without damaging your paint. Step 1: Prepare the Right Tools Removing PPF adhesive requires the right tools. Here are some items you’ll need: Step 2: Warm Up the Adhesive The first thing you should do is use heat to soften the glue. Warm up the PPF part you wish to remove with a hair dryer or heat gun set to low heat. Just enough heat should be applied to soften the adhesive without causing paint damage or film melting. Pulling off the film will be easier if you gently warm it up. Step 3: Peel Off the Film Carefully Peeling should begin at one of the PPF’s corners. To carefully raise the edge, use a plastic scraper or even a credit card. After lifting a corner, carefully remove the film with your hands. Pull slowly and at an angle while attempting to maintain constant pressure. Pulling it off quickly could harm the paint below, so you don’t want to do that. Step 4: Use Adhesive Remover After you’ve removed the film, you’ll probably see some adhesive left behind. This is where an adhesive remover comes in handy. Spray a bit of the adhesive remover onto the sticky areas and let it sit for a minute or two. After that, use a microfiber cloth to gently wipe away the residue. Don’t rub too hard; the adhesive should come off with light pressure. Step 5: Clean the Surface Once the adhesive is gone, it’s time to clean the surface. Use a standard car cleaning spray or even just soap and water to clean the area. This will help ensure that any leftover adhesive remover is taken off, leaving your paint shiny and smooth. Read More: How Much to Tip a Car Detailer Tips for Safely Removing PPF Adhesive 1. Don’t Rush: The key to removing PPF and its adhesive without damaging the paint is to take your time. Work slowly, especially if you’re using heat. Moving too quickly can cause the film to tear or the paint to peel. 2. Avoid Sharp Tools: Never use a sharp metal object to lift the film. It’s tempting to use something like a knife, but that will most certainly lead to scratches or chips in your paint. 3. Use Gentle Adhesive Removers: Stick to adhesive removers that are designed for cars. Using household solvents like acetone can be too harsh and could damage your paint. Common Mistakes to Avoid 1. Pulling Too Hard It may be tempting to complete the PPF as quickly as possible, particularly if you’re having trouble getting started. But one of the most frequent causes of unintentional paint damage is pulling too quickly or too hard. In this race, slow and steady wins. 2. Skipping the Heat
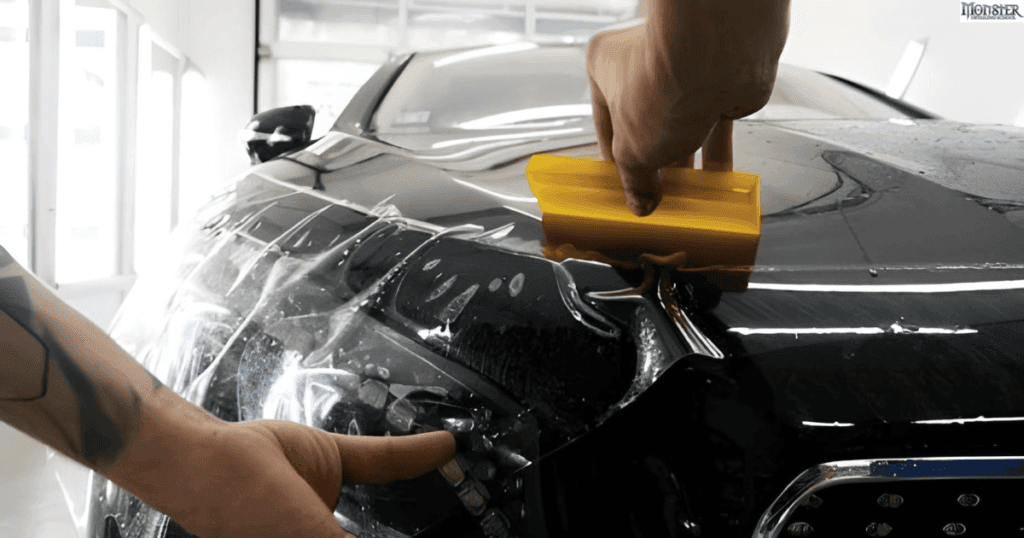
How to Apply Paint Protection Film (PPF)
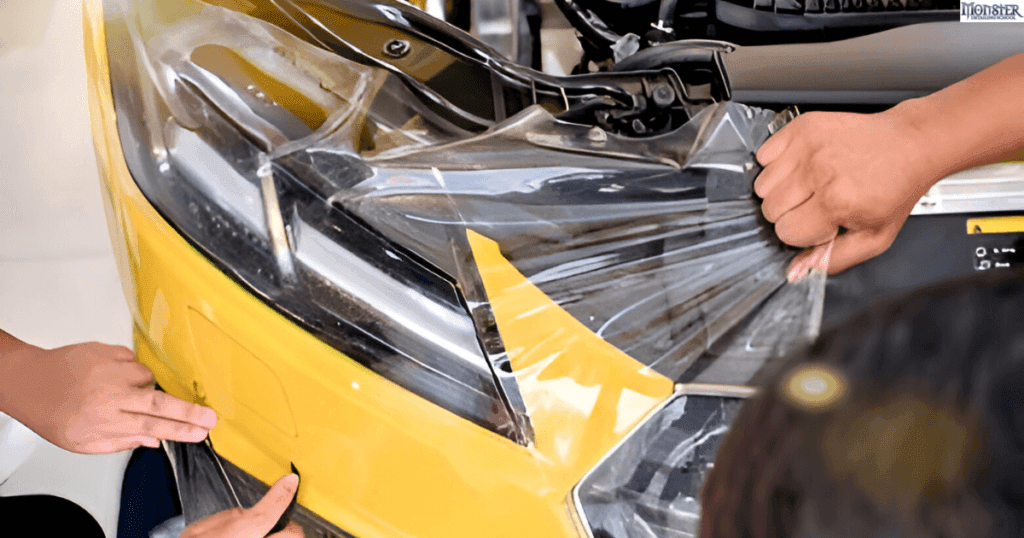
Paint Protection Film (PPF) is a must have for car enthusiasts who want to protect their vehicle’s paint from chips, scratches, and environmental damage. Whether you’re a professional or just a DIY enthusiast looking to protect your vehicle, this guide will walk you through the steps to apply PPF and offer tips on how to install it effectively. What is a Paint Protection Film? Paint Protection Film, or PPF, is a thin, durable, and clear polyurethane film that can be applied to the surface of a vehicle to protect it from damage caused by road debris, UV rays, scratches, and other environmental factors. It’s designed to absorb the impact and prevent the paint from chipping or wearing down. PPF has become popular because it offers a high level of protection while being nearly invisible when installed properly. Tools You’ll Need for Installing PPF Before starting the process, it’s important to gather the necessary tools. Having the right tools will help you achieve a smooth, professional finish. Related Blog: How to Wash a Car with Paint Protection Film? Step-by-Step Guide on How to Install Paint Protection Film Step 1: Prep the Surface To ensure that the paint protection film sticks properly, the surface of your car must be spotless. Use an alcohol-based cleaner or a specific surface prep solution to clean the car’s paint. Make sure to remove all dirt, dust, and oils. Step 2: Create a Soapy Solution Mix a few drops of mild dish soap with water in a spray bottle. This solution will allow you to adjust the position of the PPF during installation. Spray the soapy solution generously on the area of the car where the film will be applied. This will help prevent the film from sticking immediately, allowing you time to adjust it for a perfect fit. Step 3: Align the Film If you’re using a pre-cut paint protection film, it should fit the panel of your car precisely. Start by peeling back the film’s backing and gently applying it to the surface, aligning it with the edges of the panel. For bulk PPF rolls, you’ll need to cut the film to fit the panel. Step 4: Apply the Film Using the Squeegee Once the film is in place, use a squeegee to remove any air bubbles and excess water from beneath the film. Start from the center and work your way outward. The soapy solution will allow you to move the film around if needed, but once the water is removed, the film will start to adhere permanently. Step 5: Heat and Stretch the Film If you encounter curves or edges that are difficult to cover, use a heat gun to soften the film. This makes it more pliable and easier to stretch into place. Be cautious with the heat gun, as too much heat can damage the film. Apply light heat while stretching the film over the curved areas and use the squeegee to ensure a smooth application. Step 6: Final Trimming and Edging After applying the film and ensuring it’s free of bubbles, you’ll need to trim the excess film. Use a sharp cutting blade to carefully cut around the edges, making sure not to cut too close to the car’s surface. The goal is to have a clean, seamless edge. Once trimmed, use the heat gun to secure the edges and ensure they stick down properly. Step 7: Post-Installation Care After installation, avoid washing your car for at least 48 hours. This will give the film enough time to bond to the surface. After a few days, you can wash and maintain your car as usual, but avoid abrasive materials that could damage the film. Read More: How Much Does Car Polishing and Buffing Cost? Why Professional Training is Important Applying PPF may seem straightforward, but it takes precision and practice to get the best results. If you’re new to the process or want to become a professional installer, paint protection film training is highly recommended. Proper training ensures that you understand the techniques required to avoid mistakes such as air bubbles, misalignment, or poor adhesion. Taking PPF training classes helps you master the skills needed for a smooth application. Additionally, attending these classes can give you hands-on experience with expert guidance, ensuring you can offer the best installation services. For those looking to advance their skills further, there are specialized programs that offer training & certification. These certifications not only boosts your credibility but also helps attract clients who seek professional, high-quality PPF installation or other detailing services. Common Mistakes to Avoid During Installation Even with proper tools and instructions, beginners often make mistakes that can ruin the application. Here are some common mistakes to avoid: Read More: Should You Wax a Car After Polishing? Conclusion Installing paint protection film is an effective way to keep your car looking new and shielded from external damage. With the right tools, preparation, and technique, you can apply PPF yourself. However, for those looking to perfect their skills or start a business in PPF installation, paint protection film training from Monster detailing School is a smart investment. By enrolling in our PPF training classes, you’ll gain the expertise needed to install PPF like a pro. If you’re serious about offering professional services, consider taking paint protection film installation training & certification from us to enhance your skill set and provide the best protection for your clients’ vehicles. Along with PPF training Monster Detailing School also provides following courses:
