

The Ultimate Guide to Hand Polishing a Car
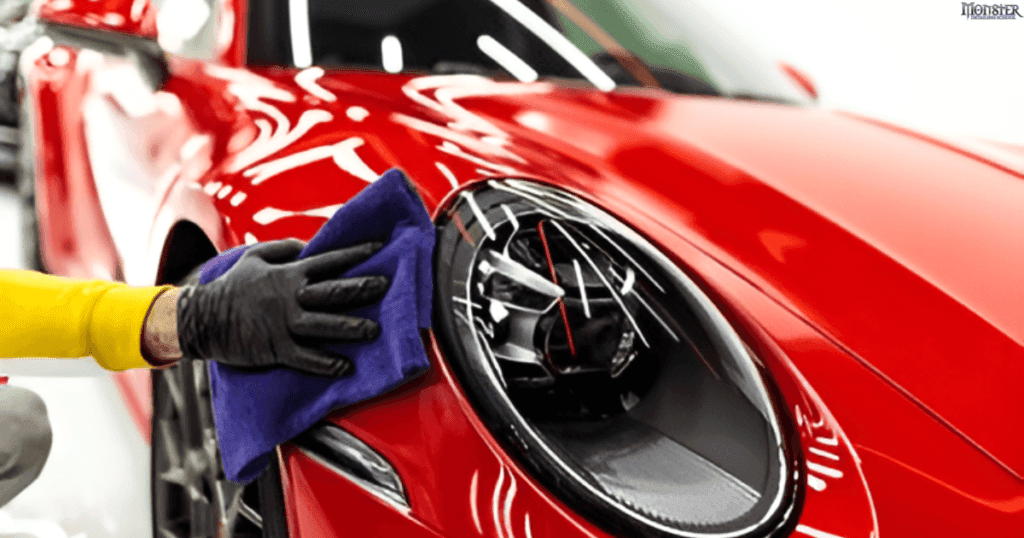
At Monster Detailing School, we’re dedicated to providing the best practices and advanced training in car detailing. Our mission is to empower students with the skills and knowledge to become leaders in the industry through comprehensive and multilingual training. This guide will show you how to polish your car by hand, covering everything from compounding to cutting, while keeping it simple for anyone to do at home. Let’s dive in and get your car looking like it just rolled off the showroom floor! Why Choose Hand Polishing? Hand polishing is an ideal option for car enthusiasts who want to take a personal approach to maintaining their vehicle’s appearance. While it does require more effort than machine polishing, it’s perfect for removing minor scratches, swirl marks, and restoring dull paint. It’s also a safer choice for beginners, as it reduces the risk of damaging the paint. Related Topic: How Long Does It Take to Polish a Car? Best Way to Polish a Car by Hand To achieve professional results when polishing by hand, follow these steps: 1. Thoroughly Wash and Dry Your Car Start by washing your car with a quality car shampoo. Make sure to remove all dirt, grime, and debris to prevent scratches during the polishing process. Dry the car with a microfiber towel. 2. Inspect the Paint Examine the paintwork to identify areas with scratches, swirl marks, or oxidation. Knowing the condition of the paint will help you determine the appropriate level of polishing needed. 3. Select the Right Polish Use a medium-cut polish for a balance between removing imperfections and refining the paint. Choose a hand friendly product that can be applied using a foam or microfiber applicator. 4. Apply the Polish with an Applicator Pad Work in small sections, using a foam or microfiber applicator pad to apply the polish in circular motions. Apply even pressure to ensure consistent results across the entire surface. 5. Buff Off the Residue After polishing each section, use a clean microfiber cloth to remove any residue. This will help reveal the improved shine and clarity. 6. Apply a Protective Wax or Sealant Finish off the process with a wax or sealant to protect the polished surface and maintain the shine. Related Topic: Should You Wax a Car After Polishing? Can I Polish a Car by Hand? Absolutely! Hand polishing is not only possible but also effective for minor imperfections and giving your car that extra glow. It’s a great choice for DIY car enthusiasts who prefer a hands-on approach. For more severe paint issues, however, using a machine polisher may deliver quicker and more dramatic results. How to Compound and Polish a Car by Hand Compounding and polishing go hand-in-hand when it comes to restoring a car’s paintwork. Here’s how to do both effectively: Start with a compound if your car has deeper scratches or noticeable oxidation. Compounds are more abrasive than polishes and help remove significant imperfections. Apply the compound using a foam pad and work it into small sections with firm pressure in back-and-forth or circular motions. Use a microfiber towel to remove any remaining compound and move on to the next area. After compounding, switch to a polish to smooth the surface further and bring out the shine. Related Topic: Hand vs. Machine Polishing: Which One Reigns Supreme? How to Cut and Polish a Car by Hand Cutting is a more intensive form of paint correction that removes a thin layer of clear coat to eliminate defects. Follow these steps for a successful cut and polish: If there are significant swirl marks or dullness, use a cutting compound. Apply it with consistent pressure and circular motions. After cutting, refine the finish with a polishing product to smooth the paint and enhance gloss. Use a microfiber cloth to remove polish residue, then apply a wax or sealant for lasting protection. How to Polish a Car by Hand at Home Polishing at home is a satisfying way to maintain your car’s appearance. Here’s a quick guide: Car shampoo, microfiber towels, polish, foam applicator pads, and wax or sealant. Wash the car to remove dirt and avoid scratches. Work on small sections at a time, applying the polish in circular motions. Use a microfiber cloth to reveal the improved paint finish. Finish with a protective layer to preserve the shine. Related Topic: Is Ceramic Coating Better Than Waxing? Why Train with Monster Detailing School? At Monster Detailing, we don’t just show you how to polish a car by hand—we equip you with the skills and techniques needed to become an expert detailer. Our training covers the latest practices and technology, ensuring our students stand out in the detailing industry. With multilingual instruction and sustainable methods, you’ll learn to deliver top quality services effectively. Whether it’s hand polishing or advanced detailing, we prepare you to offer exceptional results to your clients. FAQs 1. Is hand polishing safe for all cars?Yes, hand polishing is generally safe for all types of cars, including classic vehicles. It’s a gentle method that reduces the risk of damage, especially for beginners. 2. How often should I polish my car?Polish your car once or twice a year, depending on the paint’s condition. Frequent polishing can thin the clear coat, so it’s best to do it only when needed. 3. Can hand polishing remove deep scratches?Hand polishing can reduce the appearance of minor scratches and swirl marks. For deeper scratches, a cutting compound or machine polisher may be necessary. 4. Why use wax after polishing?Wax provides a protective layer, sealing in the shine and helping to repel dirt and contaminants. Related topic: Orbital vs. Rotary Polisher: Which is Best for Your Car Detailing Needs? Conclusion Hand polishing a car is more than just a DIY project; it’s a way to keep your vehicle in pristine condition while enjoying the satisfaction of a job well done. At Monster Detailing School, we’re committed to teaching the best practices and the most advanced techniques, equipping you with the knowledge to
Orbital vs. Rotary Polisher: Which is Best for Your Car Detailing Needs?
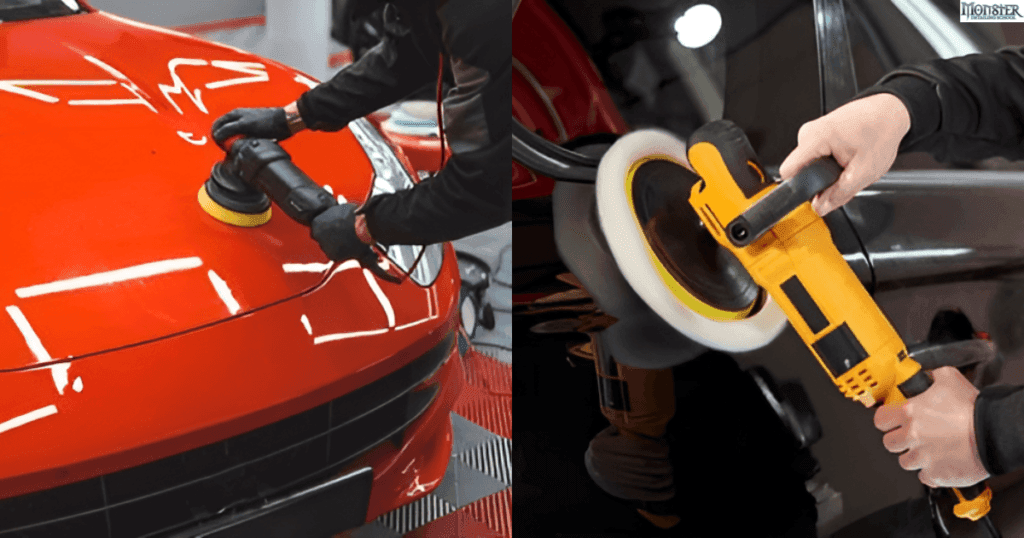
When it comes to polishing a car, choosing the right polisher can make all the difference in achieving that showroom-quality shine. Two common types of polishers are the rotary polisher and the orbital polisher also known as the random orbital or dual action polisher. In this guide, we’ll go through the differences between orbital and rotary polishers, their advantages and disadvantages, and which one might be the best choice for your detailing needs. At Monster Detailing School, we offer comprehensive training on using these tools to help our students excel in the industry, utilizing the most advanced techniques and sustainable practices. What is a Rotary Polisher? A rotary polisher is a powerful tool that uses a direct-drive system to rotate the pad in a circular motion. This type of polisher is known for its ability to correct heavy paint defects quickly, making it a favorite choice among professional detailers. Pros of Rotary Polishers: 1. Fast and Effective: The powerful circular motion can quickly correct deep scratches, heavy oxidation, and severe swirl marks. 2. Great for Heavy Correction: Ideal for vehicles with significant paint damage or neglected finishes. 3. Controlled Cutting Power: Provides more direct control over the polishing process, which can be advantageous for experienced users. Cons of Rotary Polishers: 1. Higher Risk of Damage: If not used properly, a rotary polisher can burn through the paint or leave holograms, especially in the hands of a beginner. 2. Not Ideal for Beginners: It requires more skill to handle and can be challenging to master without proper training. 3. Produces More Heat: The direct-drive motion generates more heat, increasing the risk of paint damage. Related Blog: Hand vs. Machine Polishing: Which One Reigns Supreme? What is an Orbital Polisher? An orbital polisher, also known as a random orbital or dual action polisher, moves in a more complex pattern, combining both a circular and orbital motion. The dual action of the pad mimics the natural movement of the human hand, making it a safer option for beginners. Pros of Orbital Polishers: 1. Safe for Beginners: The random orbital motion reduces the risk of paint damage, making it more user-friendly. 2. Reduces Heat Buildup: The dual-action movement generates less heat, which helps prevent burning the paint. 3. Ideal for Finishing Touches: Perfect for light to moderate paint correction and applying finishing polishes. Cons of Orbital Polishers: 1. Less Cutting Power: May struggle with heavy paint correction or deep scratches compared to a rotary polisher. 2. Takes More Time: Since it’s less aggressive, it may take longer to achieve the desired results, especially on heavily damaged paint. Related Blog: Should You Wax a Car After Polishing? Which Polisher is Best for Your Needs? Choosing between a rotary and an orbital polisher largely depends on your experience level, the condition of the vehicle’s paint, and your detailing goals. For Beginners: An orbital polisher (random orbital or dual action) is generally the best choice. The safer, less aggressive motion allows beginners to get the hang of polishing without worrying about damaging the paint. It’s perfect for everyday car care, light paint correction, and applying waxes or sealants. For Professionals: A rotary polisher is ideal for professionals who need the power and speed to correct heavily damaged paint. However, it does require skill and proper training to avoid mistakes. At Monster Detailing School, we train students on both rotary and orbital polishers, ensuring they have the expertise to handle any situation with confidence. Related Blog: How Long Does It Take to Polish a Car? Why Training Matters While using a polisher may seem straightforward, mastering the techniques is crucial for achieving the best results. At Monster Detailing School, we emphasize the importance of training with both rotary and orbital polishers. Our comprehensive courses provide hands-on experience with the latest technology, ensuring students understand the strengths and limitations of each tool. Our training programs are designed to help students become leaders in the detailing industry. We focus on: 1. Best Practices: Learn the safest and most effective polishing techniques. 2. Advanced Technology: Use the latest tools and products to stay ahead of industry trends. 3. Multilingual Instruction: Our training is accessible to a global audience, with multilingual programs to ensure everyone can benefit. 4. Sustainability: Adopt eco-friendly practices that not only deliver excellent results but also reduce environmental impact. Related Blog: How Much Does Car Polishing and Buffing Cost? When to Use a Rotary Polisher vs. an Orbital Polisher To get the best out of these tools, it’s essential to understand when to use each type: 1. Rotary Polisher: Ideal for heavy paint correction. Use this tool if the vehicle has deep scratches, oxidation, or if you need to remove sanding marks. 2. Orbital Polisher: Best for light to moderate paint correction, swirl removal, and applying polish or wax. It’s also suitable for maintaining the finish after using a rotary polisher. Conclusion Choosing between a rotary and an orbital polisher comes down to the job at hand and the detailer’s skill level. Rotary polishers are powerful and suitable for heavy correction, but they require experience to use safely. Orbital polishers, on the other hand, are beginner-friendly and perfect for light to moderate paint correction. In our auto detailing classes, we’re dedicated to offering the best practices and advanced technology to our students, ensuring they become leaders in the detailing industry. Our comprehensive, multilingual car detailing training programs equip students to deliver high-quality detailing services in a sustainable and effective manner. Whether you’re new to detailing or looking to enhance your skills, our training will help you master the art of polishing and become a true expert.
Waxing vs Ceramic Coating: What Works on PPF?

When it comes to car detailing, keeping your vehicle’s exterior looking pristine is one of the top priorities for many car enthusiasts and owners. Paint Protection Film (PPF) is an excellent solution for protecting your vehicle’s paint from everyday wear and tear, scratches, rock chips, and more. But if you’re wondering whether you can wax or ceramic coat your PPF for an added layer of protection, the short answer is yes, but there are some key details to consider. In this blog, we’ll dive into the specifics of waxing and ceramic coating Paint Protection Film. We’ll explore how each method works, the benefits, and what you need to keep in mind to maintain the effectiveness and longevity of your PPF. Waxing Paint Protection Film: Is It Necessary? Waxing has been a go to method for car owners for many years to add shine and a layer of protection to their vehicle’s paint. While it’s entirely possible to wax PPF, it may not be necessary in every case. Here are the key factors to consider: 1. PPF’s Natural Shine PPF is designed to be glossy and protective by itself. Many high-quality films already come with a hydrophobic top layer, which repels water and dirt, much like wax. So, adding wax may not enhance the appearance or protection significantly. 2. Wax Type Matters It’s crucial to select a wax that is safe for plastic surfaces if you decide to wax your PPF. The ideal choice for PPF might not be traditional carnauba waxes, which are effective on bare paint. They might potentially hide the film’s surface or block its ability to mend itself… Instead, it’s better to use synthetic waxes or sealants designed for PPF, as they are specifically formulated not to damage or dull the film. 3. Maintenance Boost Waxing can still act as an extra defense against impurities such as bird droppings, bug dust, and tree sap. A wax layer can make it even simpler to remove dirt and preserve the film’s beauty, even though PPF is already resistant to pollutants. Related Blog: Should You Wax a Car After Polishing? Ceramic Coating Over PPF: The Best of Both Worlds? Ceramic coating is a more modern and long lasting solution than traditional wax. It’s a liquid polymer that chemically bonds to the surface it’s applied to, creating a hardened layer that offers superior protection against the elements. It’s hydrophobic, meaning it repels water and keeps your vehicle cleaner for longer. But how does it work with PPF? 1. Enhanced Protection While PPF alone provides excellent protection against physical damage like scratches and chips, adding a ceramic coating can take the protection to the next level. Ceramic coatings help shield your car from UV rays, preventing discoloration or fading over time. Additionally, the hydrophobic properties make it easier to clean your car as water, dirt, and dirt slide right off. 2. Compatibility The good news is that most ceramic coatings are compatible with Paint Protection Films. However, not all ceramic coatings are created equal. It’s important to use a ceramic coating that is specifically designed for use over PPF. These coatings are engineered to work with the adhesive nature of the film and not hinder its self-healing abilities. 3. Gloss and Hydrophobicity Ceramic coatings can add an extra layer of gloss to the already shiny surface of PPF, giving your car a wet-look finish that many car enthusiasts love. Moreover, the hydrophobic properties make it more difficult for contaminants to stick to the film, reducing the amount of time you’ll spend washing and maintaining your car. Read More: Paint Protection Film: Paint Safety & Adhesive Removal Guide Steps to Properly Wax or Ceramic Coat PPF If you decide to enhance your PPF with either wax or a ceramic coating, it’s important to follow the right process to ensure you don’t compromise the film’s integrity. 1. Surface Preparation Before applying any wax or ceramic coating, the PPF must be completely clean and dry. Dirt, dust, and other particles can become trapped under the wax or coating, leading to a less than perfect finish. 2. Applying Wax If you choose to wax your PPF: 3. Applying Ceramic Coating If ceramic coating is your choice: Read More: How to Apply Paint Protection Film (PPF) Long-Term Care for PPF with Wax or Ceramic Coating Once you’ve applied wax or ceramic coating to your PPF, proper care and maintenance are key to ensuring longevity and effectiveness. 1. Regular Washing Stick to regular washing with a pH-neutral soap. Avoid harsh chemicals or degreasers, as these can break down the wax or ceramic coating over time. 2. Avoid Abrasives Avoid using abrasive brushes or sponges when washing your car. Opt for soft microfiber towels or wash dirts to prevent scratching the film or damaging the coating. 3. Reapplication Wax will need to be reapplied every few months to maintain its protection and shine. On the other hand, ceramic coatings can last for several years but may need occasional maintenance to preserve their hydrophobic properties. Related Topic: How to Wash a Car with Paint Protection Film? Conclusion You can improve your car’s protection and shine by waxing or ceramic coating its paint protection film. Ceramic coating offers a more robust, long-lasting option, even while waxing can add a layer of temporary protection. Your needs and the amount of time and effort you’re prepared to put into keeping your automobile looking nice will determine which option is best for you. For those looking for the ultimate protection, combining PPF with a ceramic coating is often considered the best of both worlds, offering physical protection from scratches and chips along with the hydrophobic and UV-resistant properties of a ceramic coating. Whether you opt for wax or ceramic coating, always ensure you are using products specifically designed for PPF, and follow the proper application techniques to maintain the integrity of the film and your vehicle’s finish. Monster Detailing School is providing following courses:
Paint Protection Film: Paint Safety & Adhesive Removal Guide

If you love your car, chances are you’re looking for ways to keep it looking great for as long as possible. One of the most popular options for protecting the exterior of your car is Paint Protection Film (PPF). But there are a lot of questions that come with it—like whether it might damage your paint or how to handle that sticky adhesive when it comes time to remove it. In this blog, we’re going to answer these questions in simple terms to make sure you feel confident about PPF. Does Paint Protection Film Damage Paint? The short answer is: no, paint protection film does not damage your car’s paint. Instead, it helps preserve it by adding a layer of protection against all the elements that can damage it. Think of PPF as a shield for your car, it’s designed to keep scratches, small stones, UV rays, and other everyday wear and tear from damaging the beautiful paint underneath. What Paint Protection Film is Safe for Your Paint 1. Quality Products Matter: The most important factor to keep in mind is the quality of the film. High-quality PPF is made with advanced materials designed to be gentle on your car’s paint while being tough against scratches and chips. It’s like putting a high-quality screen protector on your phone. It protects without leaving a mark. 2. Expert Installation is Key: Another important factor is the installation process. If applied by an experienced professional, the risk of damage is practically zero. Good installers know how to prepare the car’s surface properly, ensuring that the film sticks smoothly without any bubbles or rough spots. This process is essential because, when done correctly, the film will be easy to remove without causing any damage. Related Blog: How to Apply Paint Protection Film (PPF) When Problems Can Happen While PPF generally doesn’t cause damage, there are a few things that can go wrong if the process isn’t done properly: 1. Low-Quality Film: If a low-quality film is used, it may not adhere properly or might leave behind a sticky film, which can be tough to clean. Poor quality films can also be too rigid or hard to remove, which could lead to damage if you try to take it off. 2. Incorrect Installation: If the PPF isn’t installed by a professional, there’s a risk of damaging the paint. Inexperienced technicians could stretch the film excessively or fail to properly clean the vehicle before applying it, which could cause problems when you try to remove it. 3. Harsh Removal: Trying to pull the film off without proper techniques or tools can lead to paint peeling. We’ll go over the right way to remove it later in this blog. Related Blog: How to Wash a Car with Paint Protection Film? How to Remove Paint Protection Film Adhesive If you’ve had your PPF on for a while, you may eventually need to remove it. Maybe it’s time for a new film, or you’re ready for a different kind of protection. Whatever the reason, one of the trickiest parts of removing PPF can be dealing with the leftover adhesive. If it’s not done right, the sticky film can be a real pain. Let’s look at how you can safely remove that adhesive without damaging your paint. Step 1: Prepare the Right Tools Removing PPF adhesive requires the right tools. Here are some items you’ll need: Step 2: Warm Up the Adhesive The first thing you should do is use heat to soften the glue. Warm up the PPF part you wish to remove with a hair dryer or heat gun set to low heat. Just enough heat should be applied to soften the adhesive without causing paint damage or film melting. Pulling off the film will be easier if you gently warm it up. Step 3: Peel Off the Film Carefully Peeling should begin at one of the PPF’s corners. To carefully raise the edge, use a plastic scraper or even a credit card. After lifting a corner, carefully remove the film with your hands. Pull slowly and at an angle while attempting to maintain constant pressure. Pulling it off quickly could harm the paint below, so you don’t want to do that. Step 4: Use Adhesive Remover After you’ve removed the film, you’ll probably see some adhesive left behind. This is where an adhesive remover comes in handy. Spray a bit of the adhesive remover onto the sticky areas and let it sit for a minute or two. After that, use a microfiber cloth to gently wipe away the residue. Don’t rub too hard; the adhesive should come off with light pressure. Step 5: Clean the Surface Once the adhesive is gone, it’s time to clean the surface. Use a standard car cleaning spray or even just soap and water to clean the area. This will help ensure that any leftover adhesive remover is taken off, leaving your paint shiny and smooth. Read More: How Much to Tip a Car Detailer Tips for Safely Removing PPF Adhesive 1. Don’t Rush: The key to removing PPF and its adhesive without damaging the paint is to take your time. Work slowly, especially if you’re using heat. Moving too quickly can cause the film to tear or the paint to peel. 2. Avoid Sharp Tools: Never use a sharp metal object to lift the film. It’s tempting to use something like a knife, but that will most certainly lead to scratches or chips in your paint. 3. Use Gentle Adhesive Removers: Stick to adhesive removers that are designed for cars. Using household solvents like acetone can be too harsh and could damage your paint. Common Mistakes to Avoid 1. Pulling Too Hard It may be tempting to complete the PPF as quickly as possible, particularly if you’re having trouble getting started. But one of the most frequent causes of unintentional paint damage is pulling too quickly or too hard. In this race, slow and steady wins. 2. Skipping the Heat
How Long Does It Take to Polish a Car?

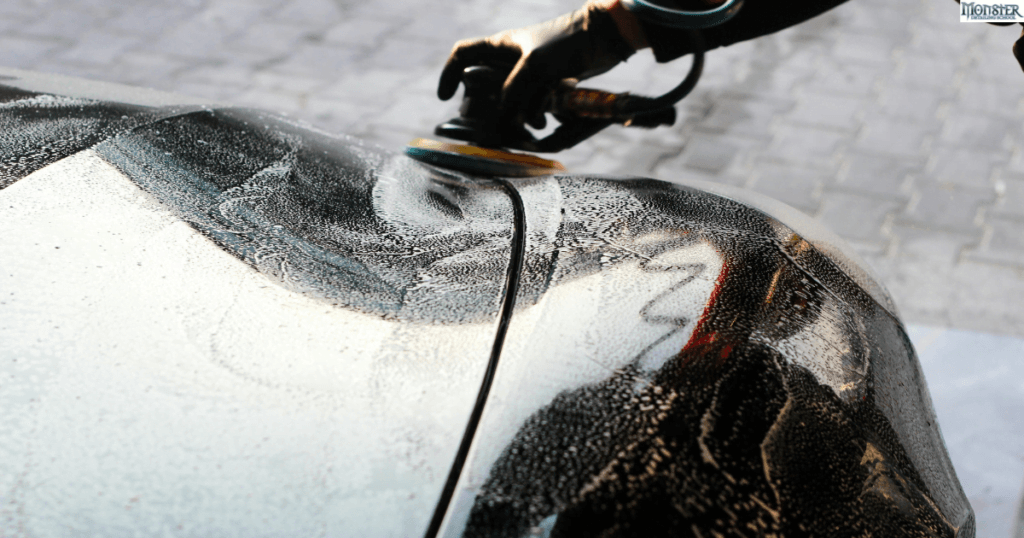
Polishing your car is an essential part of maintaining its appearance, value, and overall protection. However, the time it takes to polish a car can vary based on several factors, including the method used (machine or hand polish), the condition of the car, and the experience of the person performing the task. In this blog, we’ll break down how long it takes to polish a car and why it’s a crucial step in the detailing process. Factors Affecting Car Polishing Time Before diving into specific timeframes, it’s important to understand what can affect how long the polishing process will take. These factors include: 1. Size of the Vehicle: A larger car, like an SUV, will take longer to polish than a compact sedan. 2. Condition of the Paint: If the paint is in bad condition with scratches, swirls, and oxidation, it may require more extensive polishing. 3. Level of Polish Desired: A simple one step polish will take less time compared to a multi-step correction process. 4. Experience Level: A professional or someone who has taken a car detailing training course from us will likely complete the process faster and more efficiently than a beginner. Related Blog: How Much Does Car Polishing and Buffing Cost? How Long Does it Take to Machine Polish a Car? Machine polishing is a more efficient method for polishing a car and often yields better results than hand polishing. Depending on the factors mentioned above, the time to machine polish a car can range from 4 to 8 hours for a typical vehicle. Here’s a breakdown of the process: 1. Preparation (1-2 hours): This includes washing the car thoroughly, claying it to remove contaminants, and masking off areas that you don’t want to polish (like trims and rubber). 2. Polishing (3-5 hours): The actual polishing process involves using a machine polisher, polishing compounds, and different pads to correct the paint surface. Professionals who have completed a auto detailing training often use multiple stages of polishing to achieve the best results, which can extend the time required. 3. Final Inspection and Clean-Up (30 mins–1 hour): After polishing, the car needs to be inspected for any remaining swirls or scratches, and excess polish must be wiped off. Machine Polishing vs Hand Polishing Many car owners may ask, “Is machine polishing always necessary?” In some cases, hand polishing can be sufficient, especially for cars with minor imperfections. However, there are distinct differences in time and effectiveness between the two methods. How Long Does it Take to Hand Polish a Car? Hand polishing is a more labor intensive process and generally takes longer than machine polishing. Depending on the size and condition of the car, hand polishing can take between 6 to 12 hours. 1. Preparation (1-2 hours): Similar to machine polishing, the car must be properly washed and prepped. 2. Polishing (4-10 hours): Hand polishing involves using polishing pads and applying products manually to the surface. This method takes longer because it requires consistent pressure and movement, and it’s more difficult to achieve the same level of correction as with a machine. 3. Final Inspection (30 minutes): Like machine polishing, hand polishing should be followed by a thorough inspection to ensure no areas were missed. While hand polishing is often recommended for minor imperfections or delicate areas, it’s not as effective for heavy corrections. Most professional detailers, especially those who have undergone a car detailing course, prefer machine polishing for the majority of the work. Related Blog: Should You Wax a Car After Polishing? Why Does Polishing Take So Long? Polishing isn’t just about making your car shiny; it’s a detailed process that removes imperfections, corrects the paint, and restores the car’s surface to a like-new condition. That’s why it can take several hours or even a full day to complete, depending on the car’s needs. Additionally, polishing is an essential skill learned in most car detailing classes, and professionals spend time mastering this art to provide the best results. Investing in a proper car detailing course can help detailers save time while maintaining the quality of their work. The Benefits of Professional Car Polishing While some car owners may attempt to polish their vehicles themselves, professional polishing offers several key benefits: 1. Better Results: Professionals who have completed car detailing courses have the experience, equipment, and products to provide the best results. 2. Saves Time: Even though polishing takes time, a trained professional will complete the task much faster than a beginner. They can also advise on the best products and methods for your vehicle. 3. Paint Protection: Polishing doesn’t just make your car look good; it removes scratches, swirls, and oxidation, improving the longevity of your car’s paintwork. Read More: From Tinting to Drying: How Long Does the Window Tinting Process Take? How to Learn the Art of Polishing If you’re passionate about car detailing or want to learn how to polish cars professionally, enrolling in a our auto detailing classes is a great way to get started. These courses often cover everything from basic hand polishing techniques to advanced machine polishing methods. Whether you’re interested in detailing as a hobby or as a business, taking auto detailing training will provide you with the knowledge and skills you need to succeed. In addition to polishing, a comprehensive detailing training will teach you about paint correction, protection techniques, and the proper use of detailing tools and products. Monster Detailing School, for example, offers a variety of courses that can turn your passion for cars into a rewarding career. Conclusion Polishing a car is a time consuming but rewarding process that enhances the appearance, value, and protection of your vehicle. Whether you’re using a machine or hand polishing, expect to spend anywhere from 4 to 12 hours on the task, depending on the condition of the car and your experience level. For those who want to get into car detailing as a profession, taking a car detailing training course or will teach you how to polish cars
Different Types of Car Wraps: Which One is Best for You?
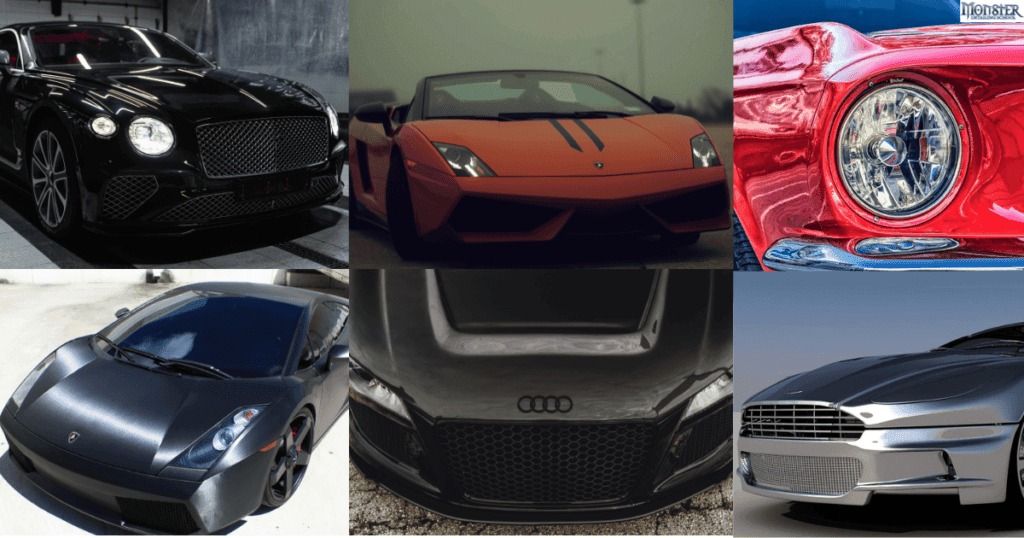
Car wraps have become a popular way to enhance the look of your vehicle, protect its paint, or advertise your business. But with so many options available, it’s important to understand the different types of car wraps and how to choose the one that best fits your needs. In this blog, we’ll explore the most common types of car wraps, help you figure out what the best type of car wrap is, and guide you through the process of choosing the right one for your vehicle. What Are Car Wraps? Car wraps are thin, adhesive vinyl films applied to the exterior of a vehicle. They allow you to change the appearance of your car without needing a permanent paint job. Wraps can be applied to the entire vehicle or just specific parts, like the hood or roof. The best part is that wraps can be removed later without damaging the original paint. Car wraps are available in various finishes and colors, making it easy to find one that suits your style or business branding. At Monster Detailing School, we specialize in applying high-quality car wraps, ensuring your vehicle looks amazing while staying protected. Read More: How Much Does It Cost to Wrap a Car? Different Types of Car Wraps There are several types of car wraps available, each offering its own unique look and level of protection. Here are some of the most popular types: 1. Gloss Wraps Gloss wraps copy the shiny appearance of a traditional paint job. They are a great option if you want your car to have a smooth and sleek finish. These wraps are available in many colors and offer a vibrant, polished look. Gloss car wraps are ideal for car owners who want to keep the look of a factory paint finish while enjoying the benefits of a vinyl wrap. 2. Matte Wraps If you’re looking for a non-reflective, muted look, matte wraps are a great choice. Matte wraps provide a modern appearance, giving your car a sleek aesthetic. Matte finishes have become more popular in recent years due to their unique look. However, they may require more maintenance to prevent fingerprints and mark 3. Satin Wraps Satin wraps sit somewhere between gloss and matte. They offer a subtle shine without the high-gloss finish, making them a stylish yet understated option. Satin car wraps are perfect for those who want a more dusky appearance but still desire some level of sheen. 4. Chrome Wraps Chrome wraps provide a reflective, mirror-like finish that is bold and eye-catching. These wraps are perfect for those who want their vehicle to stand out. However, chrome car wraps tend to be more expensive and require more careful maintenance due to their high reflectivity and delicate nature. 5. Carbon Fiber Wraps For a high-tech and performance-inspired look, carbon fiber wraps are the way to go. These wraps are textured and resemble the appearance of real carbon fiber, giving your car a sporty, aggressive look. They are particularly popular for wrapping hoods, roofs, or mirrors. 6. Brushed Metal Wraps Brushed metal wraps offer a textured, metallic finish that mimics the look of brushed aluminum or steel. They add a unique and industrial appearance to your vehicle. Read More: How Long Do Car Wraps Last? Winter Effects and Maintenance What is the Best Type of Car Wrap? The best type of car wrap depends on your personal preferences, your vehicle’s purpose, and how much maintenance you’re willing to perform. Here are some factors to consider when choosing the best wrap for you: 1. Style: If you want a traditional look, gloss wraps are your best option. If you’re aiming for a high-end, stealthy look, matte or satin wraps may be better suited to your tastes. 2. Durability: All wraps provide a layer of protection to your vehicle, but some finishes are more durable than others. For example, chrome wraps are more delicate, while satin and gloss wraps are more resilient. 3. Maintenance: Some wraps require more care to maintain their appearance. Matte and chrome wraps, in particular, may show fingerprints and need regular cleaning. If you prefer low-maintenance options, consider gloss or satin finishes. At Monster Detailing School, we offer unparalleled education in the art of detailing, ensuring that every wrap we apply is installed with precision and care. Whether you want a bold chrome wrap or a subtle satin finish, our experienced team can help you choose the perfect wrap for your vehicle. Read More: Should You Wax a Car After Polishing? FAQs 1. How long do car wraps last? With proper care, car wraps can last between 5 to 7 years. The lifespan of your wrap depends on factors like the quality of the vinyl, how often the car is exposed to harsh elements, and regular maintenance. 2. Are car wraps removable? Yes, car wraps can be removed without damaging your car’s original paint. This makes them a great option for those who want a temporary change or for businesses looking to update their branding. 3. Do car wraps damage paint? No, car wraps protect your paint rather than damage it. A wrap acts as a barrier between your car’s paint and environmental factors like UV rays, dirt, and debris. This helps keep the original paint in pristine condition. 4. What is the cost of car wraps? The cost of a car wrap depends on the type of wrap, the size of your vehicle, and the complexity of the design. Generally, car wraps range from $2,000 to $5,000. Chrome wraps tend to be on the more expensive side, while gloss and matte finishes are more affordable. Read More: How Long Does It Take to Detail a Car? Conclusion Car wraps are a fantastic way to customize your vehicle, offering a range of styles from sleek gloss to bold chrome. Choosing the best type of car wrap depends on your personal style, vehicle use, and desired maintenance level. At Monster Detailing School, we provide expert advice to ensure you get
Should You Wax a Car After Polishing?
At Monster Detailing School, we often get asked this important question: Should you wax a car after polishing? Whether you’re an auto enthusiast or someone who simply wants to maintain your car’s shine, the answer is a resounding yes! Waxing your car after polishing is a crucial step that enhances its appearance and provides much-needed protection. In this blog, we’ll tell you why waxing is important after polishing, the benefits it offers, and how it can extend the life of your car’s paint. Understanding the Difference Between Polishing and Waxing Before diving into the reasons why you should wax after polishing, it’s crucial to understand the difference between these two processes. What is Car Polishing? Polishing is a method used to restore the appearance of your car’s paint. Over time, your car’s paint can develop imperfections like scratches, swirl marks, oxidation, and fading due to exposure to the elements. Polishing involves using a mild abrasive to remove a very thin layer of paint, thus correcting these imperfections. Polishing gives your car a fresh, glossy look by revealing a new layer of paint that was hidden beneath the damaged surface. However, polishing does not provide any protective layer, it’s purely for restoration. What is Car Waxing? Waxing, on the other hand, is all about protection. Once your car has been polished, applying a layer of car wax creates a barrier that shields the paint from environmental damage. Wax protects the paint from UV rays, dirt, bird droppings, and other contaminants that can dull or damage the surface. It also enhances the shine created by polishing, giving your car a showroom-like finish. Read More: From Tinting to Drying: How Long Does the Window Tinting Process Take? Why Waxing After Polishing is Essential? 1. Protection from Environmental Damage Polishing strips away minor imperfections but also removes any protective coating that may have been present on the paint. Waxing replaces this protective layer, shielding your car’s paint from harmful UV rays, moisture, and dirt. Without wax, the freshly polished paint is left exposed to the elements, which can cause it to fade or degrade over time. 2. Maintains and Enhances Shine After polishing, your car’s paint will look glossy and new, but this shine won’t last unless it’s sealed in. Waxing locks in the glossy finish and enhances it by adding an extra layer of smoothness. The result is a mirror-like shine that makes your car stand out and keeps it looking fresh for longer. 3. Repels Dirt and Water Wax creates a hydrophobic layer that repels water and dirt. This makes it much easier to clean your car in the future, as contaminants will slide off the waxed surface. This not only saves you time but also helps preserve the cleanliness of your car between washes. 4. Longer-Lasting Results Polishing is a great way to restore your car’s appearance, but without waxing, the results won’t last as long. Wax acts as a sealant, preserving the polished look and protecting the surface from wear and tear. Regular waxing ensures that your car’s paint continues to look its best for months. 5. Saves Money in the Long Run By waxing your car after polishing, you help protect its paint, which can extend the lifespan of the finish. This means you won’t need to repaint or polish as frequently, saving you money on repairs and maintenance in the long run. Read More: How Much to Tip a Car Detailer How to Wax a Car After Polishing? Waxing your car after polishing is a simple process, but it requires the right technique to get the best results. Follow these steps for a flawless finish: 1. Wash and Dry Your Car Before applying wax, make sure your car is clean and free from any dirt or debris. Use a gentle car wash soap and a microfiber cloth to wash the surface. Dry the car thoroughly with a soft, lint-free towel. 2. Choose the Right Wax There are several types of waxes available, such as liquid, paste, or spray. At Monster Detailing School, we recommend using a high-quality paste or liquid wax for the best protection and shine. Choose a wax that suits your needs. Paste waxes often provide longer-lasting protection, while liquid waxes are easier to apply. 3. Apply the Wax in Sections Work in small sections, such as one panel at a time, to ensure even coverage. Use a foam applicator pad or microfiber cloth to apply a thin layer of wax in circular motions. Don’t apply too much wax at once, as it can be difficult to remove. 4. Let the Wax Dry After applying the wax, let it dry for a few minutes until it becomes hazy. Check the product instructions for exact drying times, as this can vary depending on the type of wax used. 5. Buff the Wax Off Once the wax has dried, use a clean microfiber cloth to buff it off, working in circular motions. This will reveal a smooth, glossy finish. Make sure to remove all excess wax for the best shine. 6. Repeat Every 2-3 Months For the best results, wax your car every 2-3 months. This helps maintain the protective layer and keeps your car looking polished and shiny year-round. Read More: How Long Does It Take to Detail a Car? FAQs Conclusion Waxing your car after polishing is a crucial step that shouldn’t be skipped. While polishing restores your car’s shine, waxing locks it in and provides essential protection. At Monster Detailing School, we offer expert polishing and waxing services education to keep your vehicle looking its best. Regular waxing not only enhances your car’s appearance but also extends the life of its paint by shielding it from environmental damage. Whether you do it yourself or let the pros handle it, waxing after polishing is a must for maintaining your car’s beauty and value.
From Tinting to Drying: How Long Does the Window Tinting Process Take?

The act of tinting car windows is getting more common than before, with various gains like from the sun, people, and the looks of the car to be gained. If you are thinking about getting your windows tinted for styling or during summer because of the hot weather, then knowing the window tinting process is of utmost importance. At Monster Detailing School, where we provide unparalleled education in the art of detailing traditional and luxury vehicles, our professionals are trained to deliver high-quality window tinting services. In this blog, we will explore how long it takes to tint windows and how long the tint takes to dry, providing you with a clear understanding of what to expect from this process. How Long Does It Take to Tint Windows? The amount of time required to tint windows on cars will depend on many variables, including the kind of vehicle, the amount of windows that need tinting, and the level of complexity of the task. On an average, the process takes between one and four hours. Factors That Affect How Long It Takes To Tint Car Windows Let’s break down the factors that affect how long it takes to tint car windows: 1. Number of Windows: A window’s number in your car directly affects the length of time it takes to finish the process of tinting. For instance, a smaller car with four or five windows is typically shorter than a SUV that has more windows. Tinting all windows of a regular car can take between 2 and 3 hours, while tinting a larger or more powerful vehicle can take as long as 4 hours. 2. Type of Vehicle: The sizes and shapes of windows vary throughout different types of vehicles. The complexity of the window design may also have an impact on how long it takes. For instance, tinting a car with curved or challenging-to-reach windows might take longer. Naturally, larger cars—such as trucks or SUVs—will take longer than smaller cars. 3. Tint Type: Different window tints have different installation times, and some may require more time than others. Higher-end tints with unique features, such ceramic tints that block out UV and infrared rays, may demand more care and precision during the installation procedure, while basic tints could take less time to apply. Our professionals at Monster Detailing School are skilled in precisely applying all kinds of colors. 4. Experience of the Technician: Highly skilled and experienced technicians will often complete the job faster and with better results. Monster Detailing’s professionals are trained in the latest techniques, ensuring that the window tinting process is done efficiently without sacrificing quality. Read More: How Much to Tip a Car Detailer What Happens During the Window Tinting Process? Understanding how the process of tinting windows will help you understand the reasons why it takes a certain amount of time. Here’s a brief outline of what the procedure includes: 1. Cleaning the Windows: The initial step of tinting windows is cleaning them thoroughly to make sure there’s no dust, dirt, or other rubbish that might hinder the fixing of the tint. This is essential since even tiny particles of dust or dirt can cause bubbles to form underneath the tint. 2. Measuring and Cutting the Tint: Once the windows have been cleaned after which the tinting film can be taken into account and then cut in order to match every window precisely. Highly skilled technicians make sure the film fits precisely to the dimensions of the window. 3. Applying the Tint: Once the film has been cured the film is sprayed onto the outside of windows. This is a delicate task which requires precision in order to avoid air bubbles and to ensure an even, smooth appearance. 4. Squeegeeing Out Bubbles: Once the tint is put on, a squeegee can be employed to eliminate air or water bubbles that have accumulated between the window and the film. This process assures that the tint sticks to the glass with no imperfections. How Long Does It Take for Tinted Windows to Dry? After the tint is applied, it will need time to cure and dry. The drying time depends on several factors, including the weather, type of tint, and your vehicle’s environment. Here’s what you need to know about how long it takes for tinted windows to dry: 1. Weather Conditions: The drying time for window tint varies depending on the weather conditions. On hot, sunny days, the tint will dry much faster than on cold, cloudy, or rainy days. In warmer temperatures, the drying process can take anywhere from 2 to 4 days. However, in colder climates, it may take up to a week or even longer for the tint to fully cure. 2. Type of Tint: Different types of tint may have varying drying times. Standard dyed films tend to dry quicker, whereas ceramic and metallic tints, which are thicker and more advanced, may take longer to dry completely. 3. Vehicle Storage: Where you park your vehicle after tinting can affect drying time. If your car is parked in direct sunlight or a warm garage, the tint will dry faster. Conversely, parking in a shaded or damp area may extend the drying time. Read More: How Long Does It Take to Detail a Car? Conclusion Tinting of windows is not simple work and has to be done with ease, accuracy, and a lot of time. On the other hand the process of tinting might take 1 to 4 hours and the period of time for the tint to dry might take 2 to 7 days depending on the type of tint as well as the climate. If you know what to look forward to and how to maintain your newly tinted windows then you can benefit from having tinted glass windows for a number of years with features such as privacy and protection from the sun’s UV radiation. Hence, it becomes important to know the window tinting process so that one is well equipped
How Much to Tip a Car Detailer

For any person who is specific about the cleanliness of their vehicle then car detailing services are quite important. Both basic and luxury car owners have a lot to benefit from car detailers since they take their time to make your car look as good as new. But when the job is done and your car is sparkling clean, you might wonder: how much is good to tip a car detailer? Here, you will learn more on the aspects of tipping car detailers, the amount that is expected, when to tip and why tipping is so important. In this blog, we will try to discuss the subject of how to tip your car detailer while staying true to the values of the Monster Detailing – which is the absolute best resource for education on traditional and luxury car detailing. Let’s learn the essential aspects of tipping and how it aligns with the premium services offered by top detailing experts. Why Tip a Car Detailer? Car washing is a delicate process no matter how complex the car is especially when dealing with conventional and exotic cars. Car detailers truly care for your car by making it look brand new and therefore, tipping is a way of encouraging the personnel. Tipping is not compulsory but is one of the ways to appreciate hard work done in washing as well as polishing every part of the car. Do You Need to Tip Your Car Detailer? The quick answer is that it is not necessary to tip however it is highly much appreciated. Detailing is more than an ordinary car wash. It is a complicated process like the correction of paint and interior vacuuming, as well as deep cleaning, and in some cases applying special coatings that ensure the protection of your car’s surface. Because it’s a meticulous work-intensive and labor-intensive process most customers prefer to give a tip as a token to show appreciation for their laborious work. In a lot of service-oriented industries Tipping has become a common practice particularly when you’re happy with the services. Detailing cars, particularly high-end vehicles, is no more or less. The effort, time and expertise involved in detailing can make a career worth a mention, however, the final decision is up to you. How Much Should You Tip a Car Detailer? When tipping a car detailer, the amount often depends on the level of service, the quality of work, and your personal satisfaction. The general rule of thumb is to tip between 10% and 20% of the total cost of the service. For instance: If your detailing service costs around $100, a tip of $10 to $20 is generally considered appropriate. If you’ve opted for more advanced services, such as those offered by highly trained professionals, the tip may range from $25 to $50 or more, depending on the complexity of the work and the final cost. Factors to Consider When Deciding the Tip In determining the amount you should pay a car detailing service, various factors could influence the decision you make: Quality of Service: Did the professional go beyond the call of duty to make sure your car looks at its finest? If you’re thrilled with the result, a greater suggestion is definitely the right choice. Type of Vehicle: The process of cleaning a luxury vehicle usually requires a lot of attention and special products. The attention to detail could be a reason to consider a bigger tip. Weather Conditions: If your vehicle was cleaned in extreme weather conditions like intense cold or heat you might want to give a larger tip to recognize the effort that the detailer put into. Time Spent on the Job: A few detailers work for hours to perfect the appearance of your vehicle. If the procedure takes longer than you expected the higher rate is a great gesture of appreciation to the time and effort they put into it. Tipping Etiquette: What Else Can You Do? While cash tips are the most common, there are other ways you can express gratitude for a job well done: If you had a great experience with your car detailer, consider leaving a positive review online. This can help the business gain more customers and let others know that the service is top-notch. Referrals are a great way to show your appreciation. If you’re impressed by the detailing work, tell others who may need similar services. Some people like to offer a pre-tip or an additional tip when scheduling regular services. This can show that you value the long-term relationship with your car detailer. When Should You Not Tip? It is a good practice to tip but there are times one cannot do it for one or two reasons. In case, the detailing service has been included in a package or you are getting some other free service in a package with some promotion, then tipping might not be obligatory. Also, if the quality of the service was low, you would not tip or tip less than you would have usually. But in the aspect of clear communication it’s always wise to let the detailer know if you’re dissatisfied with the work done. Most of the professional detailers around today are conscious of their work and will be happy to find out more on how they can do it better, especially those who already had proper training from schools such as Monster Detailing School. Conclusion Tipping a car detailer is a great way to show your appreciation for a job well done. It encourages them to continue delivering excellent service and recognizes the hard work that goes into making your car look amazing. While tipping is not obligatory, it’s a sign of gratitude that can make a big difference to the professional performing the service. Monster Detailing School a renowned impartation center in training of detailers on how to employ improved technology and eco-friendly methods in the provision of the best service. The professionals trained at schools such as Monster Detailing
How Long Does It Take to Detail a Car?

There is no better way to take your car, and make it look as beautiful as new than through a detailing session. Car detailing is a thorough process that is deeper than washing cars; it is a detailed enhancement process where the interior and exterior parts of the car may be cleaned, restored and even coated. A question that most car owners have is, “How long does it take to detail a car?” The time it will take to detail a car depends on several factors including the size of the car, its condition and the type of detailing to be done. It is now important to discuss these concepts in the capacity in which they will expand on the model’s aspects. Factors Affecting the Time to Detail a Car Several elements can influence how long it takes to detail a car. Here are some of the key factors: Size of the Vehicle: Larger vehicles such as SUVs or trucks require more time and effort to clean than smaller vehicles. Their larger surface areas and larger interiors demand more effort and time for cleaning. Condition of the Car: A vehicle that is regularly maintained will require less time for detailing as compared to one that has been heavily soiled or that hasn’t been cleaned for an extended period of time. Dirt, stains and other debris need more intense work, which can extend the length of the cleaning process. Type of Detailing: There are various types of detail services available, all with a different time commitment. A simple external wash and wax may be completed in a couple of hours, while an entire interior and exterior detailing can be a full day. Tools and Products Used: Professional detailing services such as Monster Detailing use specialized tools and high-quality equipment to provide the highest-quality outcomes. This increases efficiency but it also requires skilled handling, which may influence the overall time. Experience of the Detailer: A skilled detailer will be able accomplish the task faster than a person who is not acquainted with the procedure. Companies such as Monster Detailing train their technicians to be quick and efficient without sacrificing quality. How Long Does It Take to Detail a Car Interior? Interior car detailing is one of the processes which include the cleaning services of all the interior parts of the car. As a general rule, the process of Interior Car Detailing can take about 1 to 3 hours on an average depending whether the work to be done is big or small. What’s Involved in Interior Car Detailing? Vacuuming: It starts with performing a thorough vacuuming of your carpets, seats, as well as floor mats. This will help remove dust, crumbs, and other rubbish. Cleaning the Padding: No matter if your car is equipped with leather or cloth seats, the upholstery has to be kept clean. Leather, for example, has conditioners used to maintain the softness of the leather and to prevent cracking. To remove stains from clothes, stain removal products could be used to clean the cloth thoroughly. Dashboard and Console Cleaning: These areas may accumulate dirt and grime over time. A quality detailing service will cleanse and shine the instrument panel, controls buttons as well as air vents. Window Cleaning: The inside of your car’s windows is cleaned to ensure that you have clear visibility. Odor Elimination: As time passes, your vehicle will be sprayed with unpleasant odors from spills, food items, and smoking. Professional detailers like us employ specialized products to neutralize odors making your car smell fresh. Additional Services: For better cleaning, services such as cleaning the carpets, mats for floors or steam cleaning of the seats could be added. How Long Does It Take to Detail a Car Exterior? Exterior detailing entails the cleaning and polishing of the outer part of the car with an intention of bringing out its beauty through shining and finishing. The time which is necessary to detail a car exterior can be much different, however it can be estimated it will take from two till five hours at most. What’s Involved in Exterior Car Detailing? Washing: The exterior gets thoroughly cleaned by using a special car shampoo. High-pressure washers can be utilized to get rid of dirt, grime and other pollutants. Claying: The clay bar is used to get rid of any embedded particles of paint that aren’t removed by washing on its own. This procedure smooths the surface and prepares the surface for polishing. Polishing: After the claying process, the car’s paint is polished to eliminate tiny swirl marks, scratches and oxide. This helps restore the paint’s clarity and shine. Waxing or Sealing: A sealant or wax is placed on exteriors of the vehicle to shield the paint against UV water spots, rays as well as other elements. This can add hours to the process, but it provides the longest-lasting protection. Tire and Rim Cleaning: The rims and tires are scrubbed to eliminate dirt that has accumulated brake dust and grease. A tire shiner can also be applied to give an emollient finish. Detailing the Lights and Trims: The taillights, the headlights and trims are removed and polished. Sometimes an anti-fog coating is put on to stop fade or damage caused by the sun. How Long Does Full Car Detailing Take? In a full car detail, it will involve the normal interior services as well as the exterior ones; the car detail will take between 4-8 hours. And even more complex services or exceptionally dirty vehicles can take as much as one whole day. This duration therefore covers everything from the interior cleaning process such as vacuuming and shampooing of the interior part down to the exterior cleaning process involving washing, claying and waxing of the body of the car. Why Does Car Detailing Take So Long? Car detailing is a time-consuming process because it focuses on precision and thoroughness. The goal is not just to clean the car but to restore and protect it. Every detail, from the stitching