

How Much Does It Cost to Tint Car Windows?

Tinting your car windows is one of the best ways to give your car a sleek look while also improving comfort and privacy. But before you decide, you might be wondering: How much does it cost to tint car windows? Window tinting isn’t just about looks—it’s also practical. In this blog, we will break down the cost of window tinting, what affects the price, and how to choose the best option for your car. Why Tint Your Car Windows? Window tinting has many benefits beyond aesthetics. It keeps your car cooler, blocks harmful UV rays, reduces glare, and protects your interior from fading. It also provides privacy and security by making it harder for potential thieves to see inside your vehicle. So, how much does it cost to enjoy these benefits? Let’s take a look. Average Cost of Tinting Car Windows The cost of tinting car windows can vary a lot depending on several factors. On average, you can expect to pay between $100 and $800 for professional window tinting. Here’s what affects the price: 1. Type of Tint Film: Different types of tint films come with different costs. Standard dyed film is the most affordable, while ceramic or carbon films are more expensive because of their quality and performance. 2. Number of Windows: The more windows you want tinted, the higher the cost. Tinting just the front windows is much cheaper than tinting all the windows, including the rear windshield. 3. Vehicle Type: The type of vehicle also affects the price. Tinting a small sedan is cheaper than tinting an SUV or larger vehicle because of the size and amount of film needed. 4. Tint Quality: There are different grades of tint film, ranging from basic to premium. Premium films offer better durability, heat resistance, and UV protection, but they are more expensive. 5. Local Regulations: Some states have laws that limit how dark your tint can be, and complying with these regulations can also affect the cost. Checkout Florida’s legal window tint percentages. Cost Breakdown by Tint Type 1. Dyed Film: The most affordable option, dyed tint costs between $100 and $300 for all the windows of a standard car. However, it may fade over time and has lower heat rejection. 2. Metalized Film: This film uses metallic particles to block heat and UV rays. The price ranges from $200 to $400. 3. Carbon Film: Carbon film has better performance and a matte finish that doesn’t fade easily. It costs between $300 and $500. 4. Ceramic Film: Ceramic film is the premium choice, offering superior heat rejection, UV protection, and glare reduction. It typically costs between $400 and $800 for a complete tint job. DIY vs. Professional Tinting If you’re on a budget, you might consider DIY window tinting. DIY kits cost as little as $20 to $50, making them an attractive option. However, applying tint film is not as easy as it looks. It requires precision, patience, and a steady hand. Even small mistakes can lead to bubbles, peeling, or an uneven finish. Professional tinting ensures a flawless application with a warranty. Professionals have the training and experience needed to achieve a perfect tint, which is why many car owners consider it worth the investment. Related Blog: From Tinting to Drying: How Long Does the Window Tinting Process Take? How to Choose the Right Tint Shop Choosing the right tint shop is key to getting a quality result. Look for shops that: Quality tint shops provide a warranty to cover issues like bubbling, peeling, or discoloration. Ask about the films they use. Good shops use high-quality films from trusted brands. Window tinting takes skill and precision. Make sure the shop employs certified professionals who have complete training and certifications. Benefits of Professional Window Tint Certification When hiring a professional, it’s important to choose a tint installer with the right certifications. A certified technician who has gone through complete window tinting classes can ensure high-quality results. Is Window Tinting Worth the Cost? Window tinting is a great investment for the comfort, privacy, and value it adds to your car. The cost can seem high, especially for premium options, but when you consider the benefits—like UV protection, heat reduction, and added safety—it’s clear that window tinting is worth it. Tinted windows can also increase your car’s resale value. A car with high-quality tint is more appealing to buyers who appreciate the added comfort and style. Conclusion So, how much does it cost to tint car windows? The answer depends on several factors, like the type of film, the size of your vehicle, and whether you choose DIY or professional installation. While DIY may seem cheaper, the precision and quality offered by professional installers, especially those with window tint training and certifications—often make it worth the cost. Whether you’re looking for a budget-friendly option or want to invest in premium ceramic tint, there is a tinting solution for every car owner. If you want to learn more about window tinting or are interested in getting your car tinted, contact us today at Monster Detailing School to speak to our experts and get a quote. Liked the blog? Checkout other general queries regarding window tints:
Can You Burn Paint with a Dual Action Polisher?

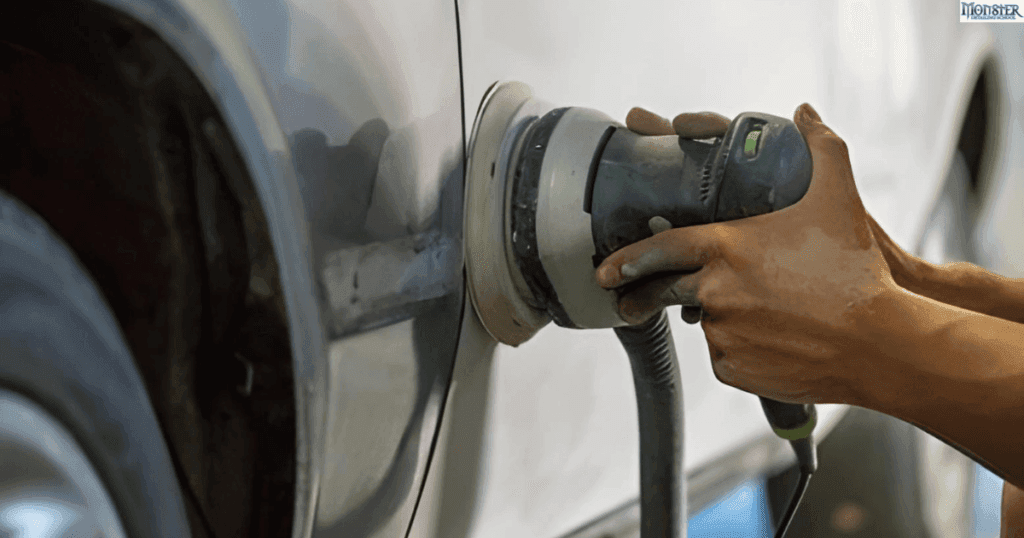
A common concern among car enthusiasts and beginners in car detailing is whether a dual action (DA) polisher can burn the paint. Unlike rotary polishers, dual action polishers are designed to be user-friendly and safe, even for those with limited experience. In this guide, we’ll explore if it’s possible to burn paint with a DA polisher and provide insights into safe polishing techniques to avoid any mishaps. Understanding the Mechanics of a Dual Action Polisher Dual action polishers are known for their unique motion, combining both rotational and oscillating movements. This design helps distribute heat and friction more evenly across the paint surface, minimizing the risk of burning. Here is a complete guide for understanding how a dual action polisher works. The oscillating action reduces the amount of concentrated heat on any given point, making dual action polishers a safer option compared to traditional rotary polishers, which only rotate and can quickly generate excessive heat if not managed carefully. We have covered this topic in detail in our previous blogs before, check that out if you are interested in learning the difference between orbital (DA) and rotary polishers. Why Heat Matters in Polishing When polishing, the pad’s friction against the paint surface generates heat. With excessive heat, the paint can start to deteriorate, potentially leading to burn marks or damage. However, due to their dual motion, DA polishers don’t usually generate the level of heat required to burn the paint, making them a preferred choice for both beginners and professionals. Additionally, most DA polishers come with variable speed settings, allowing users to control the power and reduce the risk of over-polishing. But, if you are still afraid that you might damage the paint then refer to our guide on how to polish a car with a dual action polisher. Can You Really Burn Paint with a Dual Action Polisher? While it is challenging to burn paint with a DA polisher, it’s not entirely impossible under extreme misuse. Here are some scenarios where issues might arise: 1. Using High Speeds Excessively: Running the DA polisher at its maximum speed for extended periods can increase the risk of heat buildup, especially on sensitive areas like edges. 2. Applying Excessive Pressure: Pressing down too hard on the polisher doesn’t make it more effective. Instead, it restricts the natural movement, potentially leading to heat concentration in specific spots. 3. Using Aggressive Compounds on Delicate Paint: Certain polishing compounds are more abrasive than others, and using a coarse compound on a softer paint finish can lead to damage if not handled with care. In most regular use cases, however, these scenarios are avoidable by following proper techniques, making it unlikely to burn your car’s paint with a DA polisher. Related Blog: Is a Dual Action Polisher Better Than Other Options? Conclusion While dual action polishers are designed to minimize the risk of paint burns, improper use can still lead to issues. By understanding how these tools work and following safe practices, you can confidently polish your car without fear of damaging the paint. DA polishers are indeed a safer option, especially for those new to detailing, offering effective results with minimal risk For more insights on maintaining a perfect finish and avoiding common polishing mistakes, refer to our guide on how to wax a car with a dual action polisher. Here are some more related topic you might be interested in:
Is Dual Action Polisher Better Than Other Options?
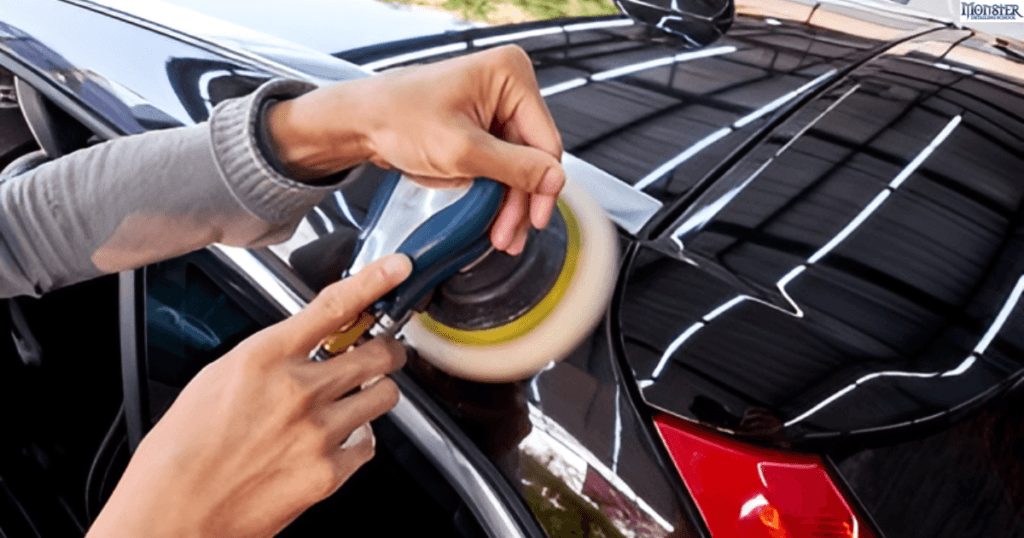
For anyone invested in car care, choosing the right polisher is essential to achieve professional-grade results at home. Dual action (DA) polishers have grown in popularity due to their unique combination of power, safety, and versatility. So, is a DA polisher worth it? And how does it stack up against other types of polishers? Here, we’ll explore the benefits of dual action polishers to help you determine if it’s the best choice for your detailing needs. What Makes a Dual Action Polisher Unique? A dual action polisher combines both spinning and oscillating motions, creating a “dual” movement that’s both effective and safe. This motion significantly reduces the risk of overheating and paint burns that can happen with rotary polishers, making it more beginner-friendly. Related Blog: Orbital vs. Rotary Polisher: Which is Best for Your Car Detailing Needs? The balanced motion also prevents swirl marks and other surface imperfections, ensuring a smooth, even finish. If you’re considering investing in one, you can learn how it can simplify detailing tasks here. Benefits of a Dual Action Polisher 1. Safety for All Skill Levels Related Blog: How to Polish a Car with a Dual Action Polisher 2. Versatility for Multiple Detailing Needs 3. Better Finish Quality Related Blog: How Does a Dual Action Polisher Work? 4. Time and Effort Saving Is a Dual Action Polisher Worth It? Absolutely. A dual action polisher provides an affordable, safe, and efficient solution for car detailing enthusiasts. It offers a balance of power and safety that allows you to achieve high-quality results without the learning curve and risks associated with more aggressive tools. Whether you’re a beginner looking to maintain your car’s appearance or a seasoned detailer seeking professional results, a DA polisher is a valuable investment that delivers exceptional value and versatility. Related Blog: How to Clean Dual Action Polisher Pads Conclusion A dual action polisher is indeed worth it, and for most users, it’s often the better choice for routine car care. With the right polisher, you can safely polish, wax, and maintain your car’s paint with ease, achieving a flawless finish every time. At Monster Detailing School, we’re dedicated to train you to find the tools and knowledge you need to excel in car care. With a DA polisher, you’ll be equipped to handle your detailing projects with confidence and ease, whether you’re restoring shine or perfecting your car’s finish. Monster Detailing School is currently offering following certification training programs:
How to Wax a Car with a Dual Action Polisher
Waxing a car with a dual action polisher not only enhances its shine but also provides a protective layer that preserves the paint. Using a dual action polisher ensures an even application of wax, saving time and effort while delivering professional-level results. In this guide, we’ll cover all the steps needed to wax your car effectively, along with helpful tips for a flawless finish. If you are a newbie and have no idea what a dual-action polisher is, don’t worry—we’ve got you covered. Learn all about dual action polishers. Why Use a Dual Action Polisher for Waxing? A dual action polisher is ideal for beginners and professionals alike. Unlike rotary polishers, which can be aggressive, dual action polishers offer a safer and more forgiving approach. This tool oscillates while spinning, mimicking the motion of a hand waxing but at a much faster rate, ensuring a smooth, streak-free application. Using a dual action polisher helps to evenly distribute wax, enhances gloss, and reduces the chances of damaging your paint. Detailed Blog: Orbital vs. Rotary Polisher: Which is Best for Your Car Detailing Needs? Tips to Waxing Your Car with a Dual Action Polisher 1. Prepare the Car Surface Before applying any wax, ensure the car is thoroughly clean. Wash the car with a high-quality car shampoo to remove dirt and contaminants. Once washed, dry the car completely using a microfiber towel to avoid water spots. 2. Choose the Right Wax Select a car wax that complements your vehicle’s paint. Paste waxes and liquid waxes work well with dual action polishers, providing long-lasting protection. For optimal results, use a wax specifically designed for machine application. 3. Apply Wax to the Polishing Pad Attach a soft foam pad to the dual action polisher. Apply a small amount of wax to the pad — usually, a few pea-sized drops are sufficient. Remember, using too much wax can lead to a streaky finish, so start small and add as needed. Related Blog: Should You Wax a Car After Polishing? 4. Spread the Wax Evenly Place the pad on the car surface without turning on the polisher. Gently spread the wax over a 2×2-foot section. Once evenly spread, turn on the polisher at a low speed setting. Move the polisher in overlapping, straight-line motions, covering each section methodically. 5. Buff and Remove Excess Wax Allow the wax to cure for the recommended time, as specified by the product instructions. Once set, use a clean microfiber towel to buff the surface, removing any excess wax and enhancing the shine. Repeat these steps section by section until the entire car is waxed. Check out our polishing with DA polisher, it’s maintenance, other uses and detailed “how to use” tips as well: Conclusion Waxing a car with a dual action polisher is a simple yet effective way to keep your car looking its best. By choosing the right products and following the proper technique, you can achieve a long-lasting, showroom-quality finish. Whether you’re a beginner or a detailing enthusiast, a dual action polisher makes the waxing process quick and rewarding. By following these steps, you can achieve a professional, glossy finish for your car with ease. For additional car care tips and detailing techniques, enroll in our comprehensive auto detailing classes.
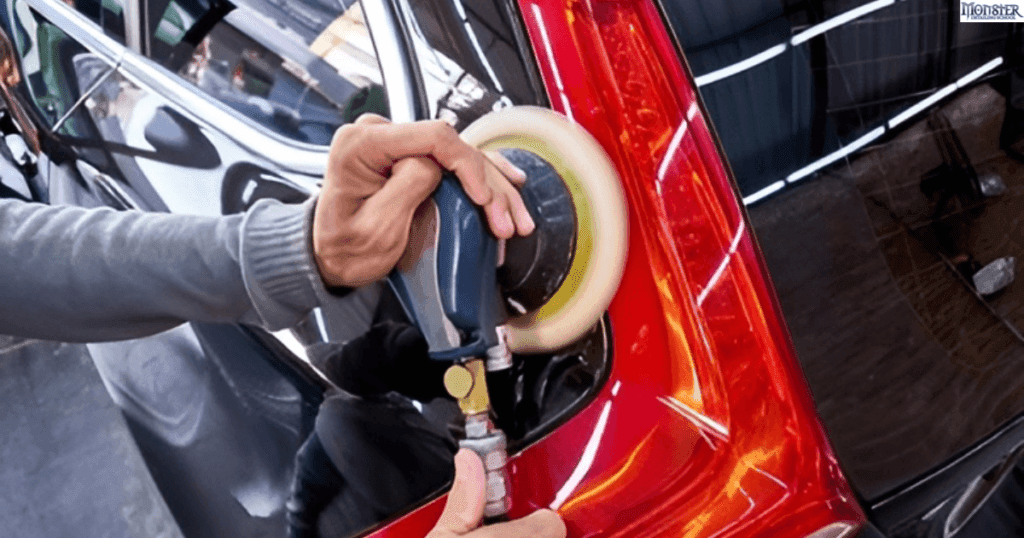
How to Polish a Car with a Dual Action Polisher
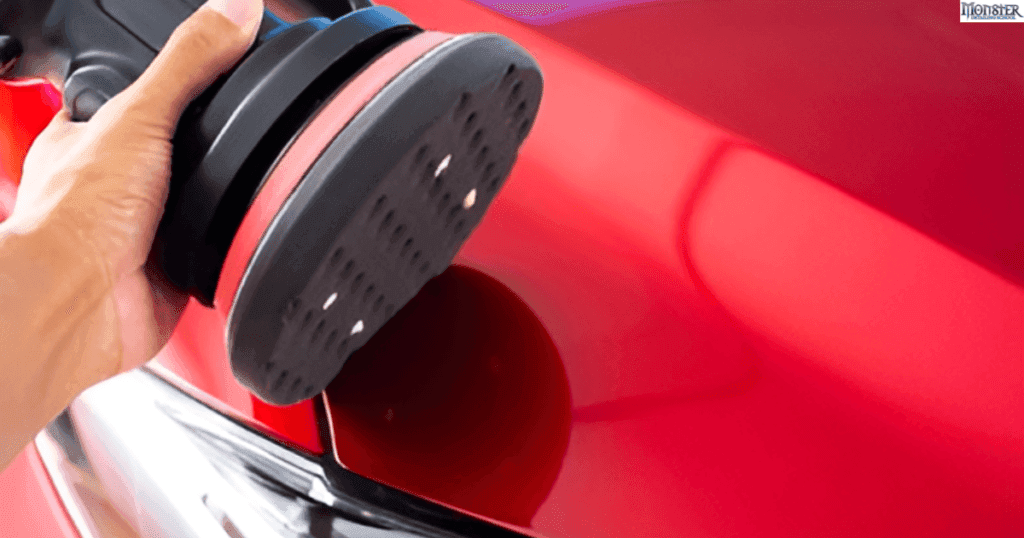
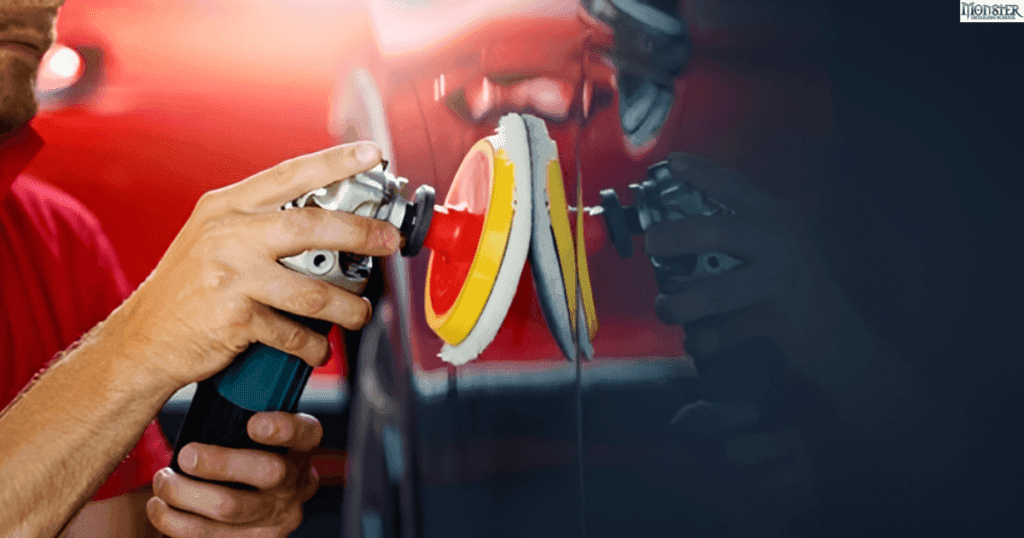
Polishing a car with a dual action (DA) polisher can transform your vehicle’s appearance, giving it a smooth, mirror-like finish. A dual action polisher is safe, efficient, and perfect for beginners and experts alike. If you’re new to polishing or looking to refine your technique, here’s a step-by-step guide to help you achieve professional results with your DA polisher. Why Use a Dual Action Polisher? A dual action polisher rotates and oscillates simultaneously, making it safer than rotary polishers, which only spin in one direction. To read our detailed comparison guide on these two polishers and their pros and cons in detail click here. The DA polisher minimizes heat buildup and reduces the risk of swirl marks, making it ideal for those new to car polishing. If you’re just getting started with car detailing or want to learn more about DA polishers, check out our following guides to understand the basics of this tool and its benefits. Easy Guide to Polishing Your Car 1. Prepare Your Car’s Surface 2. Choose the Right Pad and Polish 3. Apply Polish to the Pad Place a few small drops of polish around the pad. Spread it lightly across the surface you’ll be working on, typically a small section (like a 2×2 foot area) to ensure even coverage. 4. Start Polishing at Low Speed Set your DA polisher to a low speed (around 2-3) and start moving the polisher in slow, overlapping passes. Apply light pressure, keeping the pad flat against the paint. The low speed helps spread the polish evenly without causing splatter. 5. Increase Speed and Work the Polish Gradually increase the polisher speed to around 4-5 to allow the pad to work deeper into the paint. Move the polisher in a slow, consistent pattern, overlapping each pass to ensure even polishing. The dual action movement reduces the risk of burning the paint and ensures a smooth finish. 6. Inspect Your Work Wipe away the polish with a clean microfiber cloth and inspect the area. If imperfections are still visible, repeat the process in the same area until you achieve the desired result. 7. Final Polish and Buffing After completing each section, give the entire car a final wipe-down with a microfiber cloth to remove any leftover polish residue. This final step enhances the shine and gives your paint a deep, reflective finish. Conclusion Polishing a car with a dual action polisher is a straightforward process that can yield stunning results. With the right pad, polish, and technique, you can remove imperfections and enhance the shine of your vehicle’s paint. Related Blog: Is a Dual Action Polisher Better Than Other Options? At Monster Detailing School, we offer more tips, guides, and tools to help you achieve professional-quality results right at home. With practice, you’ll master the art of car polishing and enjoy the satisfaction of a flawless, showroom-worthy finish. We are currently offering following courses:
How to Clean Dual Action Polisher Pads
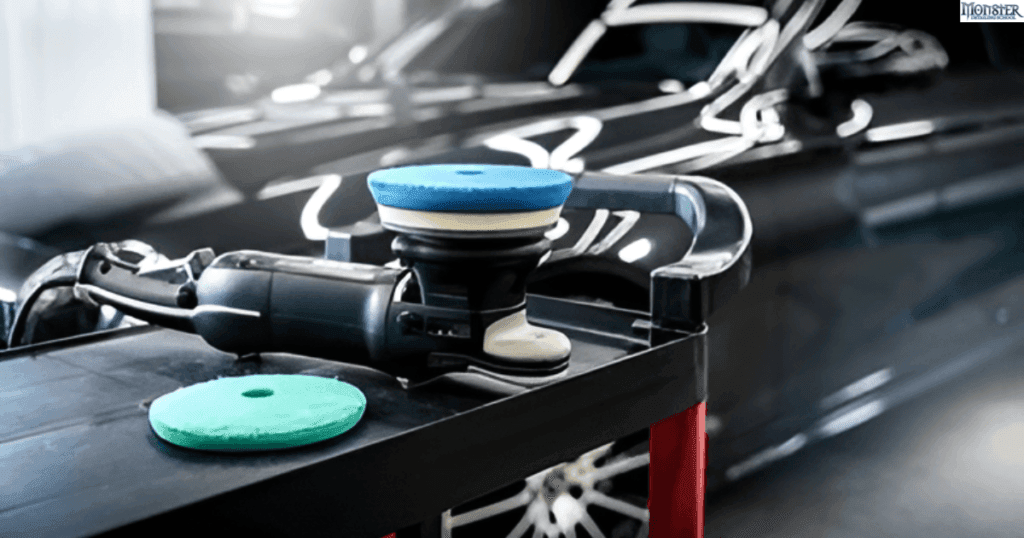
Keeping your dual action polisher pads clean is crucial for achieving the best results in car detailing. Over time, polish, wax, and other residues can build up on the pads, reducing their effectiveness. Dirty pads can even cause streaks, uneven polishing, and potentially damage your vehicle’s paint. Here’s a guide on how to keep your polisher pads in top shape, ensuring a smooth and consistent finish every time you detail. Why Clean Your Polisher Pads? When you use a dual action polisher, the pads gradually collect excess polish, wax, and paint residue. This buildup can harden, causing the pad to lose its softness and flexibility. Not only does a clean pad perform better, but it also lasts longer, saving you money in the long run. Regular cleaning prevents leftover polish from transferring to other surfaces, ensuring each polishing session starts with a fresh pad. Related Blog: How to Polish a Car with a Dual Action Polisher Step-By-Step Guide to Cleaning Dual Action Polisher Pads 1. Remove Excess Product Before you start cleaning, use a soft brush or a microfiber cloth to wipe off any visible product residue from the pad. This will make the actual washing process easier and faster. 2. Rinse with Warm Water Place the pad under warm running water. Rinsing with warm water helps loosen up the polish or wax on the pad’s surface, making it easier to remove. 3. Apply a Pad Cleaner or Mild Soap Apply a few drops of a specialized pad cleaner or a mild liquid soap directly onto the pad. Gently massage it into the foam with your fingers, ensuring that the cleaner works its way into the pad’s pores. This step helps break down any residues trapped within the pad, leaving it clean and ready for the next use. 4. Rinse and Squeeze Rinse the pad thoroughly with warm water, squeezing it gently to remove the cleaner and any remaining polish. Be careful not to twist or wring the pad, as this could damage the foam. Continue rinsing until the water runs clear, indicating that the pad is free of cleaner and residue. 5. Dry the Pad Properly After cleaning, lay the pad on a clean, dry towel and press down gently to remove excess water. It’s essential to let the pad air dry completely before storing it or using it again. Avoid high heat or direct sunlight, as these can cause the foam to degrade over time. Extending the Life of Your Polisher Pads Quality dual action polisher pads can be an investment, so taking care of them ensures you get the most out of every pad. Proper cleaning not only maintains their efficiency but also extends their life. For those looking to get started with dual action polishers, check out our guide on how a dual action polisher works to better understand the importance of clean pads in achieving flawless results. Conclusion Cleaning your dual action polisher pads is an easy but important part of car detailing. It ensures a high-quality, professional finish on your vehicle, free from swirl marks or unwanted streaks. By taking the time to clean and maintain your pads after each use, you’ll be prepared for every detailing session with tools that are in top condition. At Monster Detailing School, in our car detailing classes we offer more tips and tools for detailing enthusiasts and professionals alike. With the right techniques and maintenance, you can make the most of your dual action polisher, creating smooth, flawless finishes every time. More blogs on DA polishers:
How Does a Dual Action Polisher Work?

A dual action (DA) polisher is a popular tool in car detailing, loved for its ease of use and ability to create a stunning finish. This tool is designed to remove minor scratches, swirl marks, and imperfections from the surface of a car’s paint, making it look smooth and glossy. But what makes a dual action polisher unique? The Dual Action Difference Unlike traditional polishers that only rotate in a single, circular motion, a dual action polisher has two motions. It spins on its own axis while also moving in a broader, orbital pattern. This “dual action” is what makes it safer and easier to control, especially for beginners. By combining both movements, the DA polisher reduces the risk of creating uneven spots or damaging the paint due to heat buildup. Instead, it spreads the pressure and polishes evenly across the surface. Check out our detailed blog on DA/orbital vs. rotary polisher. How Does It Work on Paint? When you turn on a dual action polisher, its pad rotates and oscillates, gently spreading polish or compound over the car’s surface. This dual motion allows the polisher to work on imperfections like fine scratches and oxidation without being too aggressive. The result is a smooth, polished finish that brings out the paint’s natural shine. Related Blog: Can You Burn Paint with a Dual Action Polisher? The dual action polisher’s design makes it forgiving and user-friendly, reducing the risk of damaging your paint. It’s a versatile tool, ideal for polishing, buffing, and even light sanding if needed. Following blogs will help you understand the tool’s versatility: At Monster Detailing School, our car detailing training courses can show you exactly how to use a DA polisher to get professional results, helping you gain confidence in every detail. Related Topics:
Can You Use a Dual Action Polisher for Sanding?
Many people associate dual action (DA) polishers solely with polishing and buffing, but did you know they can also be used for sanding? While it may seem surprising, DA polishers are versatile enough to handle light to moderate sanding tasks when paired with the right accessories. In this blog, we’ll dive into how you can use a dual action polisher for sanding, the benefits, and tips to get the best results. Why Use a Dual Action Polisher for Sanding? A DA polisher can effectively tackle light sanding tasks on a variety of surfaces, especially when working on automotive projects. The dual-action movement is ideal for gentle, controlled sanding without the risk of leaving deep scratches or uneven spots. This tool’s orbital motion ensures that sanding marks are minimized, which is crucial if you’re working on visible surfaces like car panels. Using a DA polisher for sanding allows you to save time and energy compared to hand-sanding. Plus, it provides a consistent, smooth finish that’s often harder to achieve manually. This technique is especially popular in car detailing, where DA polishers can be used to prep a surface for further correction, painting, or polishing. Related Blog: What is a Dual Action Polisher and Why Do You Need It? How to Use a Dual Action Polisher for Sanding 1. Select the Right Sanding Discs DA polishers require special sanding discs rather than regular polishing pads. These discs come in various grit levels, allowing you to choose the appropriate grit based on the job’s requirements. For example, lower grits (like 400 or 600) are great for rougher sanding, while higher grits (like 1200 or 1500) are better suited for finishing touches. 2. Adjust the Speed Settings Most DA polishers have variable speed settings, which allow you to control the tool’s power. For sanding, it’s usually best to work at a lower speed. This keeps the process smooth and prevents overheating, which could damage the surface or sanding disc. A slower speed setting also gives you better control over the tool’s movement, ensuring even sanding across the area. 3. Work in Sections Just like with polishing, it’s best to sand in small sections. This approach helps you stay focused and achieve a consistent finish. Working in sections also lets you monitor your progress more closely, ensuring you don’t over-sand any particular spot. 4. Maintain Light Pressure Applying too much pressure while sanding with a DA polisher can leave marks or even damage the surface. The polisher’s movement is designed to do the work for you (learn how a DA polisher works), so it’s best to use light pressure. Let the tool glide over the surface, creating a smooth, even finish. Benefits of Using a Dual Action Polisher for Sanding 1. Gentle and Safe Sanding The dual action polisher’s orbital movement makes it far gentler than rotary tools, reducing the risk of uneven surfaces or deep marks. This is especially helpful if you’re new to sanding, as it’s a more forgiving tool for beginners. We have a complete comparison guide on DA/orbital vs. rotary polishers and which is more suitable for you. 2. Versatility and Convenience With a DA polisher, you’re not just limited to sanding – you can switch out your sanding disc and continue with polishing or buffing. This versatility allows you to complete multiple detailing tasks without needing different tools. Check out our following blogs to understand the versatility of a DA polisher: 3. Professional-Level Finish Sanding with a DA polisher provides a smooth, even surface that’s ideal for further work, whether that’s paint correction, sealing, or final polishing. The result is a flawless foundation for any detailing step you plan to take next. Tips for Sanding with a Dual Action Polisher Sanding produces dust and particles, so always wear a mask, goggles, and protective clothing. This keeps you safe and makes cleanup easier. Overheating can damage the paint or panel you’re working on. Work in short bursts, allowing the surface to cool between passes. If you’re new to using a DA polisher for sanding, start on a test panel to get comfortable with the process before moving on to the real project. Conclusion A dual action polisher is a valuable tool in any detailer’s toolkit, capable of much more than just polishing. With the right knowledge and practice, you can use it for sanding, too, creating a smooth foundation for further detailing. Whether you’re just getting started or want to enhance your skills, our training programs at Monster Detailing School cover everything you need to know about DA polishers – from polishing to sanding and beyond. Join our car detailing course to unlock the full potential of this versatile tool and take your detailing skills to the next level. People also ask for:
What is a Dual Action Polisher and Why Do You Need It?
If you’re looking to master car detailing, a dual action (DA) polisher is one of the essential tools to know. This tool is designed to polish a car’s paint safely and efficiently, helping to remove imperfections like scratches, swirl marks, and oxidation. As a crucial skill taught in our car detailing classes, learning to use a DA polisher can elevate your detailing work and give you the confidence to achieve a professional finish every time. How a Dual Action Polisher Works A DA polisher has a unique movement that makes it safer and easier to use, especially for beginners. Unlike rotary polishers that spin in a fixed circle, a dual action polisher also known as orbital polisher spins and oscillates in a random orbital pattern. Check out our complete guide on how a dual action polisher works. This combination of actions is what makes it dual – and it’s the key to its effectiveness and safety. By spreading out the pressure and reducing heat, a DA polisher protects the paint from damage, making it a perfect choice if you’re just getting started with detailing. Benefits of Using a Dual Action Polisher 1. Perfect for All Skill Levels With our guidance, you can use a dual action polisher confidently and effectively. The tool’s forgiving nature reduces the risk of burning the paint or leaving marks, making it an ideal choice for beginners. It’s also versatile enough for pros who want to achieve high-quality results with minimal effort. 2. Efficient Paint Correction The DA polisher’s orbital motion safely eliminates paint defects like scratches, swirl marks, and oxidation. This correction step is vital in detailing, as it helps bring out a flawless, mirror-like finish. With proper training, you’ll be able to use this tool to restore shine and smoothness, impressing customers or enhancing your vehicle’s look. Learn how you can use dual action polisher for sanding. 3. Compatible with Different Pads In our courses, we not only teach how to select the right pad but also how to maintain DA polisher pads for various tasks, from polishing to waxing. A DA polisher works with multiple pad types, allowing you to tailor your approach for specific correction levels. Whether you need a softer pad for finishing or a firmer one for deeper correction, a DA polisher has you covered. 4. Time-Saving Power Polishing by hand can be time-consuming and tiring, but a DA polisher streamlines the process. It’s faster and more consistent, allowing you to work through each step more efficiently. With practice and guidance, you’ll be able to polish an entire vehicle smoothly and with professional results in a fraction of the time. Here is our detailed blog on hand vs. machine polishing. Why Learn to Use a Dual Action Polisher? Mastering a dual action polisher is essential for anyone serious about detailing, and our training school is here to help. Through hands-on experience, you’ll learn to work safely, efficiently, and achieve results that last. We provide insights on speed settings, pressure application, and the best products to pair with your DA polisher, so you leave the course ready to take on any polishing challenge confidently. Conclusion Monster Detailing School will guide you through every step of learning the dual action polisher, turning a complex task into an easy-to-master skill. With a personalized car detailing training course, hands-on practice, and expert guidance, you’ll be equipped to tackle any detailing challenge with confidence. Whether you’re just starting or want to sharpen your skills, join us to learn professional-level detailing techniques that will take your abilities to the next level. Learn more from our in-depth blogs on DA polishers:
How to Maintain PPF Film on Your Car?
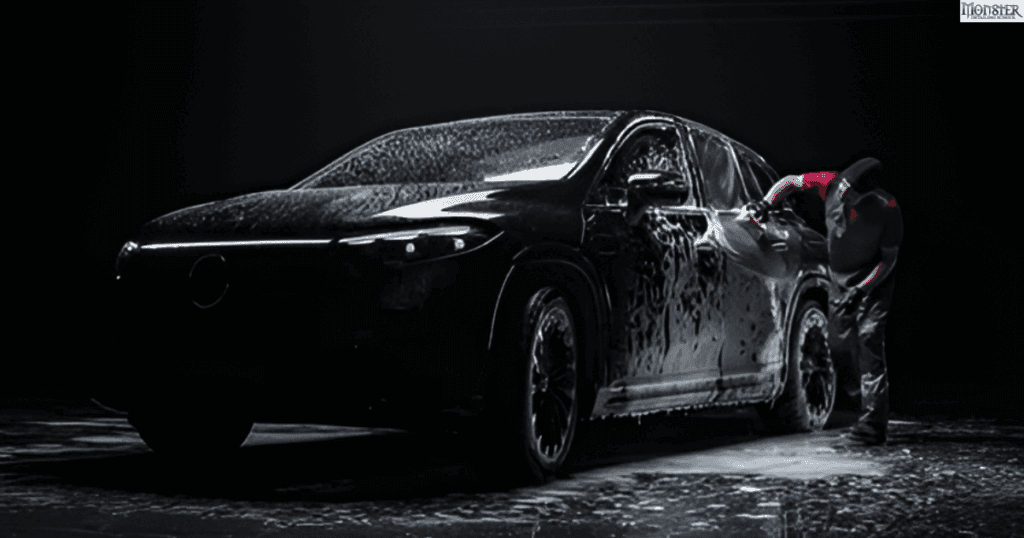
If you’ve recently added Paint Protection Film (PPF) to your car, congratulations! You’ve taken a smart step in keeping your car’s paint safe from scratches, chips, and other damage. But to make sure you get the most out of your PPF, proper maintenance is key. At Monster Detailing School, we not only teach you how to install PPF but also how to take care of it so that it lasts as long as possible. In this guide, we’ll show you how to maintain your PPF film easily, so your car stays looking new for years to come. What is PPF and Why Does It Need Maintenance? PPF, or Paint Protection Film, is a clear layer applied to your car’s exterior to shield it from minor scratches, rock chips, and environmental contaminants. While PPF is extremely durable, maintaining it properly ensures that it keeps protecting your vehicle and stays invisible. Proper maintenance can also prevent yellowing, peeling, or damage to the film. Tips for Maintaining PPF on Your Car Maintaining PPF isn’t difficult, but it does require a few simple steps to make sure your car continues to look its best. Let’s dive into some easy ways to take care of your PPF. 1. Wash Your Car Regularly One of the best things you can do to keep your PPF in great shape is to wash your car regularly. Dirt, grime, bird droppings, and other debris can accumulate on your car’s surface, which can affect the PPF over time. Use a gentle car wash soap and soft microfiber cloth or mitts to clean the car. Stick to pH-balanced car shampoos. Avoid using harsh detergents or chemicals that could break down the PFF’s top layer. Use one bucket for soapy water and another for rinsing your mitt. This method helps prevent scratching the film. Here is a detailed blog on how to wash a car with Paint Protection Film? 2. Dry Properly After washing, make sure you dry your car properly. Leaving water spots on the PPF can lead to mineral deposits that are tough to remove. Use a soft microfiber towel to blot the car dry instead of wiping, which can cause swirl marks. 3. Be Mindful of the Edges When washing or drying your car, be careful around the edges of the PPF. Avoid using high-pressure water directly on the edges, as this can lift the film. Also, avoid picking at the edges, as this can cause peeling. 4. Avoid Automatic Car Washes Automatic car washes, especially the ones with brushes, are not recommended for vehicles with PPF. The brushes can be abrasive and may cause scratches or even lift the edges of the film. Instead, opt for hand washing or touchless car washes to keep your PPF intact. 5. Use Ceramic Coating for Extra Protection Ceramic coating can be applied over your PPF to provide an extra layer of protection. It makes it easier to clean and adds a glossy finish. The ceramic layer acts as a hydrophobic shield, repelling water and making it harder for contaminants to stick. 6. Waxing Your Car? Be Careful If you plan to wax your car, make sure you use a PPF-safe wax. Traditional waxes that contain petroleum or harsh chemicals can damage the PPF. Check the product label to ensure it’s suitable for use on PPF before applying. Related Topic: Waxing vs Ceramic Coating: What Works on PPF? 7. Deal with Contaminants Quickly Bird droppings, bug splatters, and tree sap can damage the PPF if left on for too long. These substances are acidic and can eat through the film if not removed promptly. If you notice any of these contaminants, clean them off as soon as possible using a detailing spray or by washing the area gently. 8. Avoid Parking in Direct Sunlight for Long Periods While PPF is designed to handle UV rays, prolonged exposure to direct sunlight can cause the film to wear out faster. When possible, park in the shade or use a car cover to protect your vehicle from excessive sun exposure. Check out our detailed blog on does paint protection film protect against the sun? 9. Use the Right Products Using the right products is crucial for maintaining your PPF. Stick to microfiber towels for drying and detailing, as they are gentle on the surface. Also, use PPF-safe detailing sprays to keep the film clean and shiny between washes. How to Fix Minor Issues with PPF Sometimes, despite your best efforts, you might notice minor scratches or scuffs on your PPF. Don’t worry—self-healing PPF can often take care of these small issues on its own. Simply apply a little heat, either from warm water or a hairdryer, to help the film heal itself. Read More: Understanding Self-Healing PPF: How It Works and Why It’s Beneficial If you notice edges lifting or any other issues, it’s best to consult a professional or reach out to Monster Detailing School for advice. Why Choose Monster Detailing School for PPF Training At Monster Detailing School, we not only install PPF but also train future professionals on how to properly care for and maintain it. Our PPF training classes cover everything from installation to long-term maintenance, ensuring that you have the skills needed to keep any vehicle looking its best. Proper maintenance is key to maximizing the benefits of PPF, and with our guidance, you can offer top-notch care for your clients. Conclusion Paint Protection Film is an excellent way to keep your car’s paint looking flawless, but it needs a little care to perform at its best. By washing your car regularly, avoiding harsh chemicals, being careful around the edges, and dealing with contaminants quickly, you can extend the life of your PPF and keep your car looking great. If you’re interested in learning more about PPF maintenance or want to get hands-on training, Monster Detailing School is here to help. Remember, taking care of your car’s PPF not only keeps it looking good but also protects your investment.